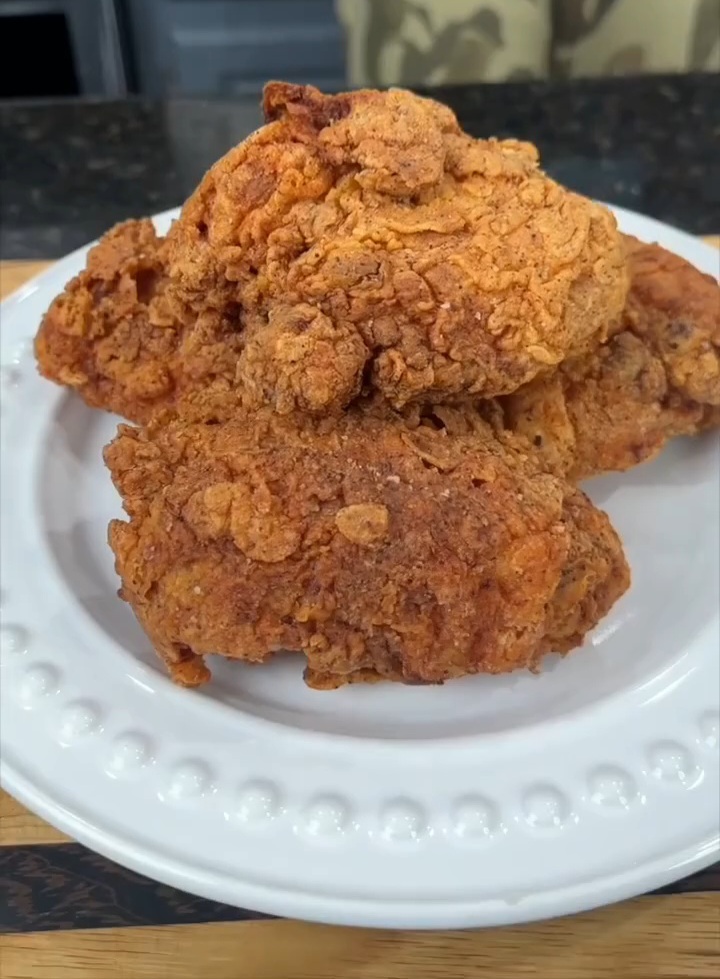
There’s something universally satisfying about biting into perfectly crispy fried chicken. That golden-brown crust, the succulent and juicy meat underneath—it’s a recipe for perfection. After experimenting with numerous methods, I’ve finally uncovered the crispiest fried chicken recipe that will change how you think about fried chicken forever. Let’s head to the kitchen and make it happen.
The Crispiest Fried Chicken Recipe
Step 1: Clean and Marinate the Chicken
Before diving into frying, preparation is key. Start by thoroughly cleaning your chicken pieces. Once cleaned, it’s time for the secret to ultimate flavor—the marinade.
Ingredients for the Marinade:
- Chicken bouillon powder: Adds depth of flavor.
- Hot sauce: For a kick of heat and extra flavor.
- Buttermilk: Tenderizes the chicken and helps in achieving that perfect crunch.
Marinating Process: Mix the chicken bouillon powder, your favorite hot sauce, and buttermilk in a bowl. Submerge your chicken in this marinade, ensuring every piece is well-coated. Let the chicken soak up the flavors for at least 1 hour, but ideally for up to 24 hours. The longer the marinating process, the more flavorful and tender the chicken will become.
Step 2: Prepare the Dry Coating
After marinating, it’s time to craft the perfect crunchy coating. The key to the ultimate crunch lies in this flour mixture.
Ingredients for Dry Coating:
- All-purpose flour: Forms the base for the crispy coating.
- Cornstarch: This is the game-changer. Cornstarch helps to achieve that extra crispiness.
- Baking powder: A pinch of baking powder keeps the coating light and helps it puff up during frying.
- Seasonings to taste: Salt, pepper, garlic powder, paprika—season the flour to your preference.
Instructions for Dry Coating: In a large mixing bowl, combine the all-purpose flour, cornstarch, and baking powder. Add in your favorite seasonings and mix until thoroughly combined. This mixture will be the first and last layer of coating on the chicken, ensuring maximum crunch.
Step 3: Make the Wet Batter
To elevate this fried chicken even further, we’re going to introduce a wet batter. This step adds an extra layer of crunch that’s irresistibly crispy.
Ingredients for Wet Batter:
- All-purpose flour: Similar to the dry coating, it provides structure.
- Cornstarch: Once again, cornstarch is the key to that next-level crisp.
- Egg whites: Helps bind the ingredients and create a smooth batter.
- Vodka: This may sound unusual, but trust me—it’s the secret ingredient. The alcohol in vodka evaporates quickly during frying, leaving behind a delicate, crispy texture.
Instructions for Wet Batter: In a separate bowl, whisk together the all-purpose flour, cornstarch, egg whites, and vodka until smooth. The vodka’s quick evaporation during frying ensures an incredibly crunchy texture that rivals even the best Korean fried chicken.
Step 4: Fry the Chicken
Now comes the most exciting part—frying the chicken. This process ensures that the crispy coating adheres perfectly while the chicken remains juicy inside.
Step-by-Step Frying Instructions:
- Remove the chicken from the marinade: After marinating for at least an hour, take the chicken out and let any excess buttermilk drip off.
- Dredge in wet batter: Dip the chicken into the wet batter you just prepared, ensuring each piece is coated evenly.
- Coat in seasoned flour: Next, transfer the chicken from the wet batter to the dry flour mixture. Press the flour mixture onto the chicken to make sure it sticks well.
- Heat the oil: In a deep fryer or large pot, heat oil to 350°F (175°C). The temperature is crucial for ensuring that your chicken cooks evenly and crisps up perfectly.
- Fry the chicken: Place the chicken pieces carefully into the hot oil. Fry for about 8 to 12 minutes, depending on the size and type of chicken pieces you are cooking. Ensure they are cooked through and golden brown. Larger pieces may need a bit more time, while smaller ones cook faster.
Pro Tip: Don’t overcrowd the pan or fryer. Fry in batches to maintain the oil temperature, ensuring a perfectly crisp exterior.
Step 5: Enjoy the Crispiest Fried Chicken
After frying, let the chicken drain on a wire rack or paper towels to remove any excess oil. And there you have it—the crispiest fried chicken you’ve ever tasted. The combination of the buttermilk marinade, cornstarch flour mixture, and vodka-based batter results in a perfectly crunchy exterior while keeping the inside tender and juicy.
Bonus Tips for Extra Crispy Chicken
- Maintain Oil Temperature: Use a thermometer to keep your oil at a steady 350°F. If the temperature drops too low, the chicken will absorb too much oil and become greasy. If it gets too hot, the outside will burn before the inside cooks through.
- Let the Chicken Rest: After frying, allow your chicken to rest for a few minutes. This helps the coating set and become even crispier.
- Double-Fry for Extra Crispiness: Want to take it up a notch? Double-fry your chicken by frying it once, letting it cool slightly, and frying it again for a few minutes. This technique is commonly used in Korean fried chicken and results in an ultra-crispy crust.
- Season Immediately: For an added burst of flavor, sprinkle your fried chicken with a pinch of salt or seasoning right after it comes out of the fryer. The residual heat helps the seasoning stick to the crispy coating.
Frequently Asked Questions (FAQ)
1. Can I use boneless chicken for this recipe? Yes! This recipe works equally well with boneless chicken breasts or thighs. Just adjust the frying time accordingly—boneless pieces typically cook faster.
2. What oil is best for frying? Neutral oils with high smoke points, like vegetable oil, canola oil, or peanut oil, are ideal for frying. They help achieve a golden-brown crust without imparting strong flavors.
3. Can I make this recipe gluten-free? Absolutely! You can substitute the all-purpose flour with gluten-free flour and achieve similar results. Just ensure that your cornstarch and other ingredients are gluten-free as well.
4. Can I make the batter ahead of time? It’s best to prepare the wet batter just before frying for optimal results. However, you can mix the dry ingredients ahead of time and store them in an airtight container until ready to use.
5. How do I know when the chicken is fully cooked? Use a meat thermometer to check the internal temperature of the chicken. It should reach 165°F (75°C) to ensure it’s cooked through. Alternatively, cut into the thickest part of the chicken and ensure the juices run clear.
This crispiest fried chicken recipe is sure to impress at your next family dinner or gathering. The combination of a flavorful marinade, secret ingredients like cornstarch and vodka, and precise frying techniques ensures a crispy, crunchy, and utterly delicious result every time. Once you’ve mastered this recipe, you may never go back to another fried chicken method again. Now it’s your turn—get in the kitchen and make it happen!