Quick Answer
Crockpot Beef Tips with Gravy is a classic comfort food made by slow-cooking well-marbled beef until it’s fork-tender in a rich homemade brown gravy. This version uses simple pantry ingredients, a quick browning step for deeper flavor, and a slow cooker to create tender beef and silky gravy with very little hands-on work. It’s an excellent choice for busy weeknights, Sunday family dinners, or meal prep.
Easy Crockpot Beef Tips with Gravy That Everyone Will Love
When you’re looking for a dinner that’s hearty, comforting, and almost effortless, it’s hard to beat Crockpot Beef Tips with Gravy. The slow cooker does most of the work, transforming inexpensive beef chuck into incredibly tender bites surrounded by a rich, savory gravy that’s perfect for spooning over mashed potatoes, egg noodles, or steamed rice.
What makes this recipe especially dependable is its balance of simplicity and flavor. Browning the beef before it goes into the slow cooker creates a deeper, more robust gravy, while onions, garlic, Worcestershire sauce, and beef broth slowly blend together into a sauce that’s rich without feeling heavy. The result is a meal that tastes like it simmered all day because it actually did.
This recipe is also wonderfully practical. Most of the ingredients are pantry and refrigerator staples, the preparation is straightforward, and leftovers reheat beautifully for lunches or another family dinner later in the week. If you enjoy slow-cooked comfort meals, you may also like Slow Cooker Pot Roast (Tender, Hearty & No-Fail Crockpot Dinner), another classic that’s perfect for make-ahead family dinners.
Whether you’re cooking for a busy weeknight, preparing a relaxed Sunday meal, or stocking the freezer with homemade dinners, this Crockpot Beef Tips with Gravy recipe delivers consistent, reliable results that both beginners and experienced home cooks can feel confident making.


Why This Recipe Works
There are plenty of beef tip recipes available, but a few key techniques make this version especially reliable and flavorful.
Browning Builds Flavor
Taking a few extra minutes to brown the beef before slow cooking creates caramelized surfaces that add remarkable depth to the finished gravy. While you could skip this step, the richer flavor and darker color are well worth the small amount of additional effort.
Chuck Roast Becomes Exceptionally Tender
Chuck roast contains plenty of connective tissue and marbling, making it one of the best cuts for slow cooking. During the long cooking time, those tissues gradually break down into gelatin, giving the beef its signature fork-tender texture while naturally enriching the gravy.
A Homemade Gravy Without Canned Soup
Instead of relying on condensed soups, this recipe builds flavor from beef broth, onions, garlic, Worcestershire sauce, soy sauce, Dijon mustard, and simple seasonings. The result is a gravy that tastes homemade, balances savory richness with subtle depth, and complements the beef rather than overpowering it.
Slow Cooking Keeps the Beef Moist
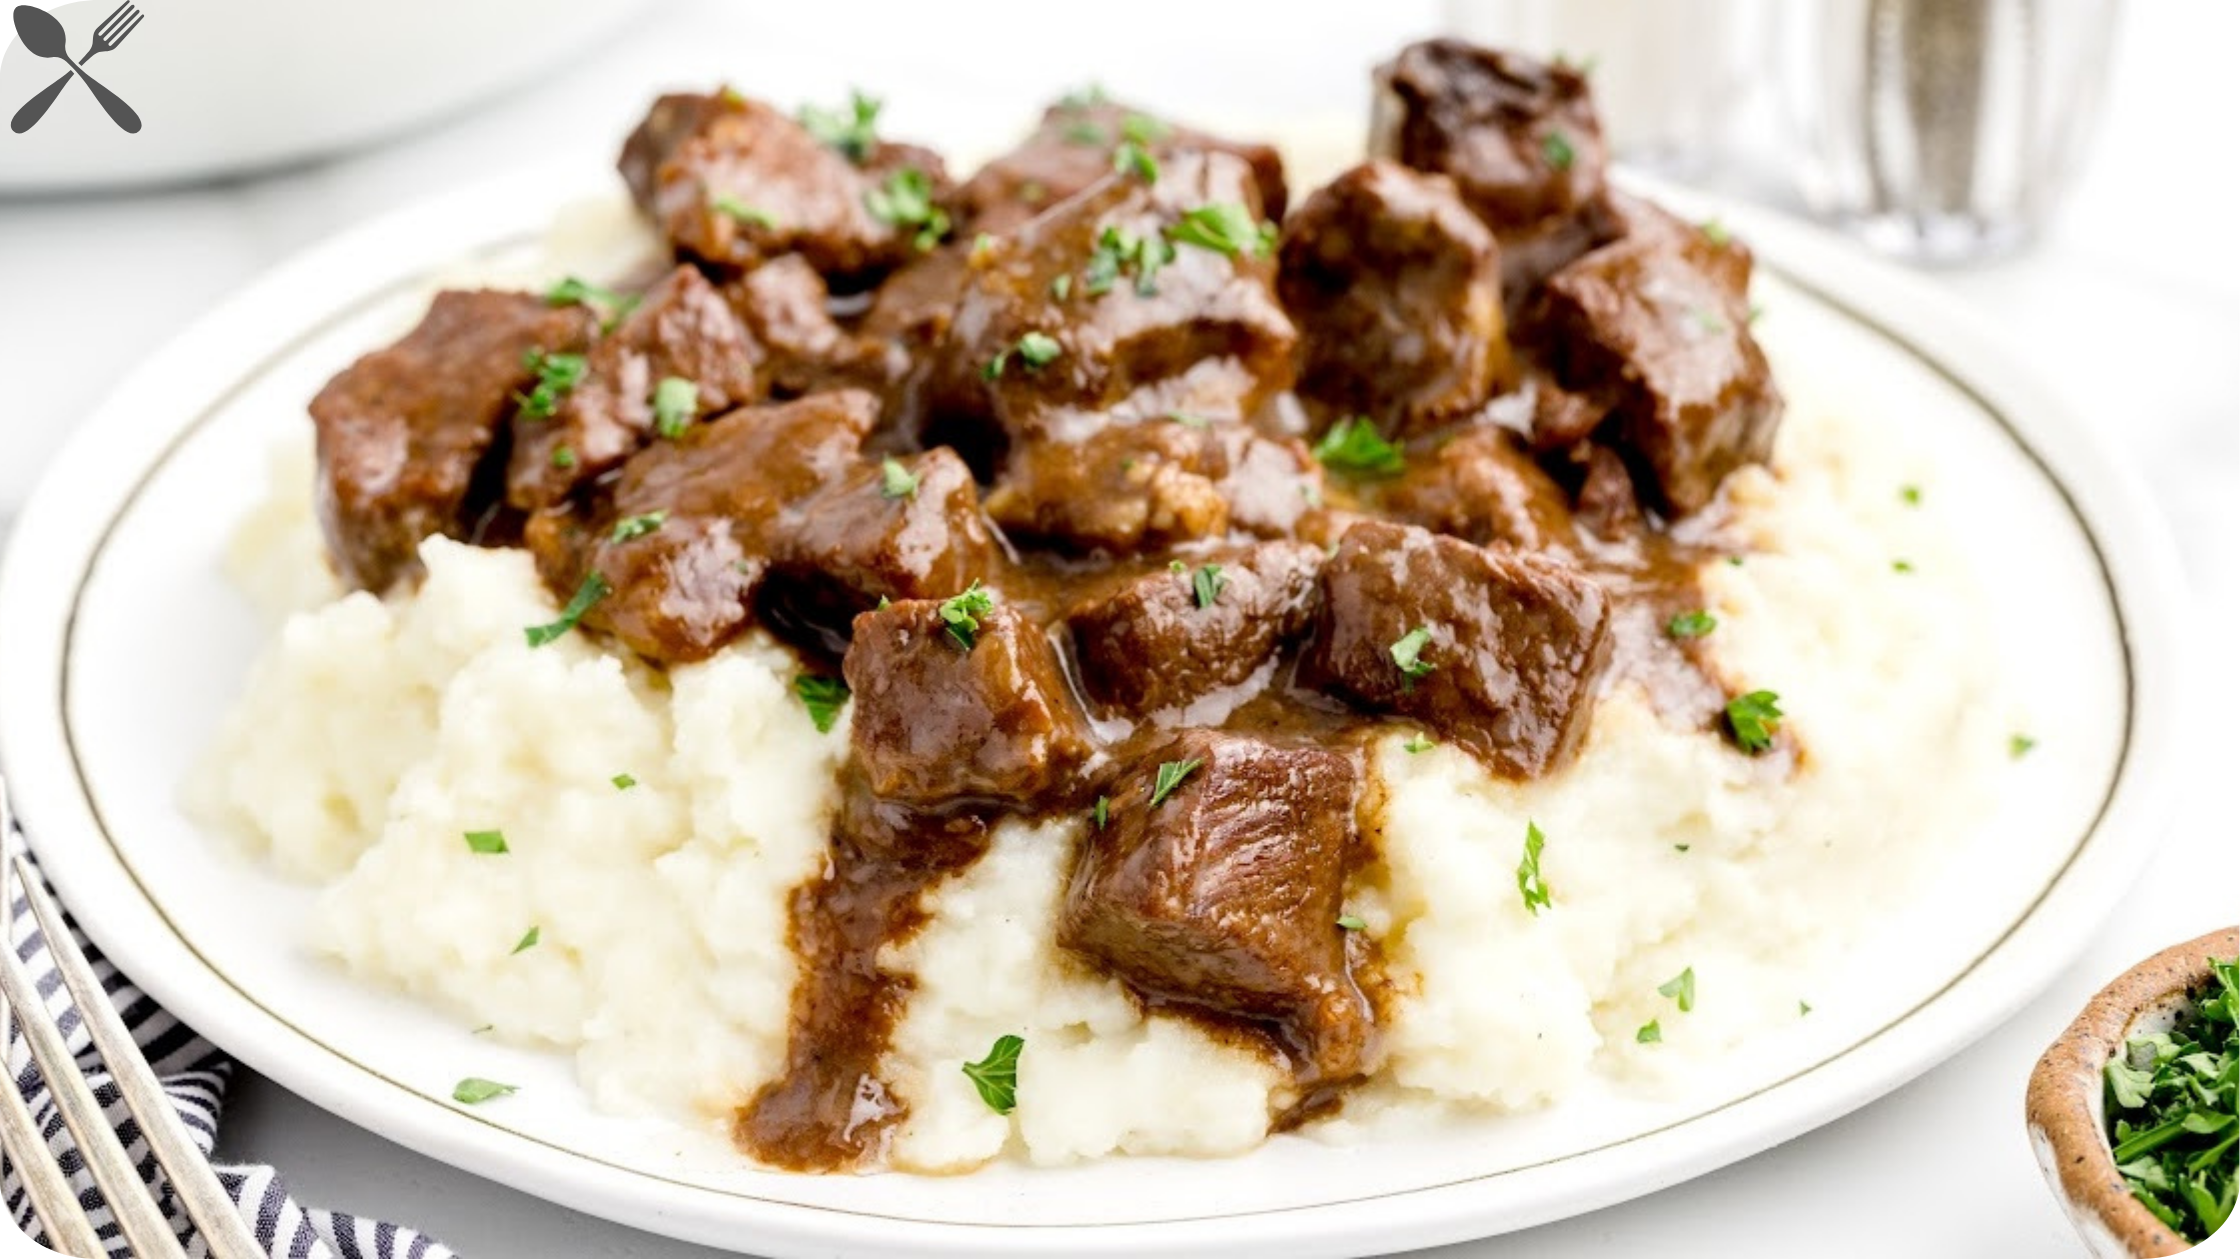
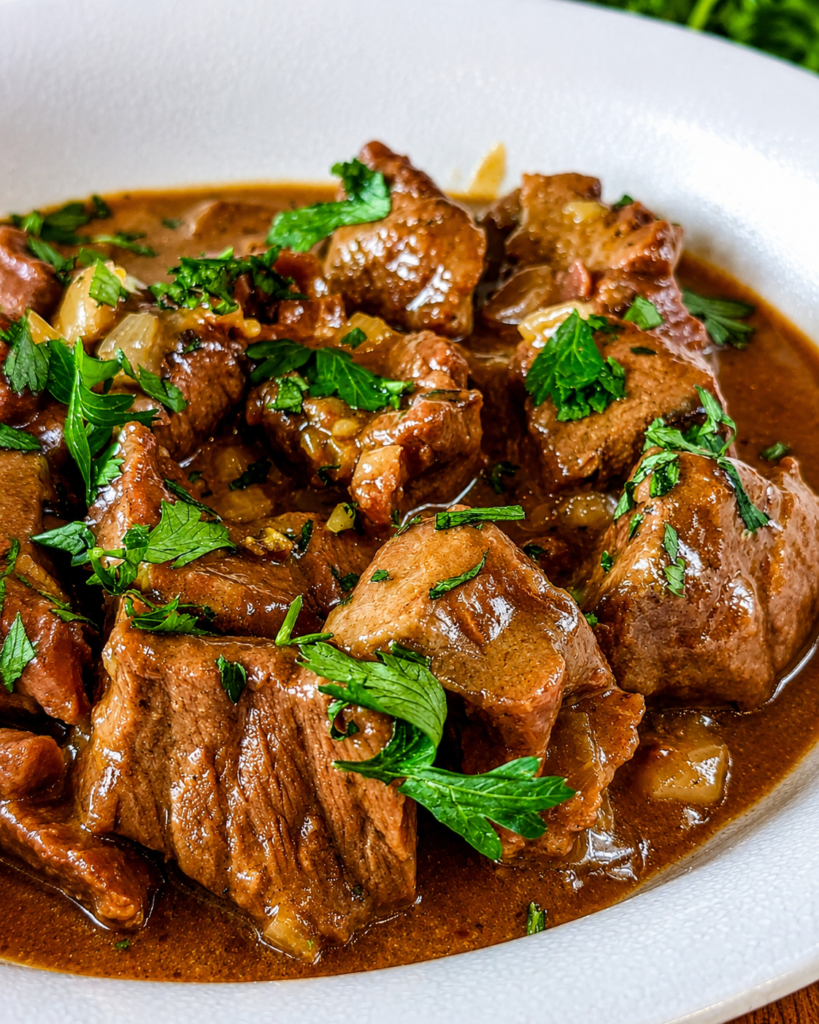
Cooking the beef gently over several hours allows the fibers to relax instead of tightening. The meat stays juicy while slowly absorbing the surrounding flavors, producing tender beef pieces that closely match the appearance and texture shown in the finished dish.
Cornstarch Thickens at the Right Time
Adding the cornstarch slurry near the end of cooking creates a smooth, glossy gravy without becoming gummy or overly thick. This timing allows the sauce to coat every piece of beef while remaining silky enough to spoon generously over your favorite side dishes.
Easy Enough for Any Home Cook
One of the biggest strengths of this recipe is its forgiving nature. Aside from browning the beef, nearly everything goes into the slow cooker, making it an excellent recipe for beginners, busy families, and anyone who enjoys preparing comforting homemade meals with minimal active cooking time.
Recipe Summary
| Recipe Information | Details |
|---|---|
| Prep Time | 20 minutes |
| Cook Time | 8 hours (LOW) or 4½–5 hours (HIGH) |
| Rest Time | 10 minutes |
| Total Time | Approximately 8 hours 30 minutes |
| Servings | 6 |
| Course | Main Course |
| Cuisine | American |
| Difficulty | Easy |
| Estimated Calories | About 465 per serving |
Ingredients
For the Beef
- 2½ pounds beef chuck roast, trimmed and cut into 1½-inch cubes
- 1 teaspoon kosher salt
- 1 teaspoon freshly ground black pepper
- 2 tablespoons all-purpose flour
- 2 tablespoons vegetable oil
Aromatics
- 1 large yellow onion, diced
- 4 garlic cloves, minced
Gravy
- 2 cups low-sodium beef broth
- 1 tablespoon Worcestershire sauce
- 1 tablespoon soy sauce
- 1 teaspoon Dijon mustard
- 1 teaspoon onion powder
- 1 teaspoon garlic powder
- ½ teaspoon dried thyme
- ½ teaspoon dried parsley
- ¼ teaspoon paprika
Thickening Slurry
- 3 tablespoons cornstarch
- 3 tablespoons cold water
For Finishing
- 2 tablespoons unsalted butter
- 2 tablespoons chopped fresh parsley
Ingredient Notes
Beef Chuck Roast
Chuck roast is the best choice for this recipe because its marbling and connective tissue gradually break down during slow cooking. That process creates tender beef and naturally enriches the gravy. Lean cuts such as sirloin or round can become dry and won’t produce the same melt-in-your-mouth texture.
Low-Sodium Beef Broth
Using low-sodium broth gives you better control over the final seasoning. Since Worcestershire sauce and soy sauce both contribute salt, it’s easier to add more seasoning later than to fix an overly salty gravy.
Worcestershire Sauce
This pantry staple adds subtle depth without making the gravy taste like Worcestershire sauce. It enhances the beef’s natural richness and creates a more complex flavor.
Soy Sauce
Only a small amount is needed. It boosts savory flavor and helps deepen the color of the gravy while remaining nearly undetectable in the finished dish.
Dijon Mustard
The mustard doesn’t make the gravy taste mustardy. Instead, it adds a gentle tang that balances the richness of the beef and helps round out the overall flavor.
Cornstarch Slurry
Always mix cornstarch with cold water before adding it to the slow cooker. Stirring dry cornstarch directly into hot liquid can create stubborn lumps that are difficult to remove.
Fresh Parsley
Adding parsley just before serving brightens both the appearance and the flavor. If fresh parsley isn’t available, it’s perfectly fine to leave it out rather than substitute a larger amount of dried parsley.
Equipment
You’ll only need a few basic kitchen tools to prepare this recipe:
- 6-quart (or larger) slow cooker
- Large skillet or sauté pan
- Mixing bowl
- Whisk
- Measuring cups and measuring spoons
- Sharp chef’s knife
- Cutting board
- Wooden spoon or silicone spatula
- Small bowl for mixing the cornstarch slurry
- Tongs for turning the beef while browning
Having everything measured and ready before you begin makes the cooking process much smoother. Since the beef browns quickly, preparing the ingredients in advance helps you move from the skillet to the slow cooker without rushing.
Instructions
1. Prepare the Beef
Pat the beef cubes dry with paper towels before seasoning. Removing excess moisture helps the meat brown instead of steam.
Season the beef evenly with the kosher salt and black pepper, then sprinkle the flour over the meat and toss until each piece has a light coating.
Why it matters: The flour encourages better browning and later helps the gravy develop a silky consistency.
What success looks like: Every piece should have a thin, even coating without any dry patches or clumps of flour.
2. Brown the Beef
Heat the vegetable oil in a large skillet over medium-high heat until it shimmers.
Working in batches, arrange the beef in a single layer without overcrowding the pan. Brown each side for about 2 to 3 minutes, then transfer the beef to the slow cooker.
Repeat until all of the beef has been browned.
Why it matters: Browning develops deep savory flavor and creates caramelized bits that enrich the finished gravy.
What success looks like: The beef should have rich brown edges while remaining mostly uncooked in the center.
Avoid: Crowding the skillet. Too much beef at once lowers the pan temperature and causes the meat to release moisture instead of browning.
3. Add the Aromatics
Scatter the diced onion and minced garlic evenly over the browned beef inside the slow cooker.
The onions will soften during cooking while the garlic gently perfumes the gravy without becoming overpowering.
What success looks like: The onions should be evenly distributed so they cook down into the sauce rather than remaining in one large pile.
4. Make the Gravy Base
In a mixing bowl, whisk together:
- Beef broth
- Worcestershire sauce
- Soy sauce
- Dijon mustard
- Onion powder
- Garlic powder
- Dried thyme
- Dried parsley
- Paprika
Whisk until everything is fully blended, then pour the mixture evenly over the beef and onions.
Why it matters: Mixing the liquid ingredients first distributes the seasonings evenly throughout the gravy.
What success looks like: The liquid should nearly cover the beef while leaving a few pieces slightly exposed.
5. Slow Cook Until Tender
Cover the slow cooker with the lid.
Cook using one of these settings:
- LOW: 8 hours (recommended)
- HIGH: 4½ to 5 hours
Avoid lifting the lid during cooking unless absolutely necessary. Each time the lid is removed, valuable heat escapes and the cooking time increases.
Why it matters: Gentle, steady heat allows the connective tissue inside the chuck roast to slowly break down, producing exceptionally tender beef.
What success looks like: The beef should easily separate with a fork while still holding its shape. It should look juicy and coated in rich brown gravy.
Warning sign: If the beef still feels firm or chewy, it simply needs more cooking time.
6. Thicken the Gravy
About 20 to 30 minutes before serving, whisk together the cornstarch and cold water until completely smooth.
Pour the slurry into the slow cooker while gently stirring the gravy.
Replace the lid and continue cooking until the gravy thickens.
Why it matters: Adding the slurry near the end keeps the gravy smooth and glossy instead of becoming gummy.
What success looks like: The gravy should lightly coat the back of a spoon and cling naturally to each piece of beef.
If it’s still too thin: Mix an additional tablespoon of cornstarch with one tablespoon of cold water and stir it in gradually.
7. Finish the Gravy
Turn off the slow cooker.
Stir in the butter until completely melted.
Taste the gravy and adjust the seasoning with additional salt or pepper if needed.
Why it matters: Butter adds a smooth finish and enhances the richness without making the gravy heavy.
What success looks like: The gravy should appear glossy, silky, and evenly blended.
8. Garnish and Rest
Sprinkle the chopped fresh parsley over the beef just before serving.
Allow the dish to rest for about 10 minutes before serving.
Why it matters: Resting gives the gravy time to settle and slightly thicken while allowing the flavors to fully come together.
What success looks like: The finished dish should feature tender chunks of beef coated in rich homemade gravy with soft onions and bright parsley, closely matching the appearance of the hero image.
This Crockpot Beef Tips with Gravy is delicious served over creamy mashed potatoes, buttered egg noodles, fluffy white rice, or alongside warm crusty bread to soak up every bit of the savory gravy.
Chef Tips
These practical tips will help you get the most tender beef and the richest homemade gravy every time.
1. Choose Well-Marbled Chuck Roast
Chuck roast has the ideal balance of meat, fat, and connective tissue for slow cooking. As it cooks, the collagen melts into the gravy, creating exceptional tenderness and flavor.
2. Brown the Beef in Small Batches
Resist the urge to brown everything at once. Giving each piece space in the skillet allows proper caramelization instead of steaming.
The extra few minutes make a noticeable difference in the finished gravy.
3. Don’t Rush the Cooking Time
If the beef isn’t fork-tender yet, it simply isn’t finished cooking.
Adding another 30 to 60 minutes often transforms slightly chewy beef into perfectly tender bites.
4. Keep the Lid Closed
Every time the slow cooker lid is lifted, heat escapes and cooking slows down.
Unless you’re adding the cornstarch slurry near the end, leave the lid closed throughout the cooking process.
5. Taste Before Adding More Salt
Since beef broth, Worcestershire sauce, and soy sauce already contain sodium, wait until the very end before adjusting the seasoning.
A small pinch is often all that’s needed.
6. Add Fresh Herbs at the End
Fresh parsley is best sprinkled over the finished dish just before serving.
Adding it too early causes it to lose its bright color and fresh flavor.
7. Let the Gravy Rest Briefly
Allowing the finished dish to sit for about 10 minutes before serving helps the gravy finish thickening naturally and gives the flavors time to settle.
8. Serve on Warm Plates
Warm serving dishes help keep both the beef and the gravy hot longer, especially when serving mashed potatoes or noodles alongside.
9. Make Extra for Leftovers
This recipe often tastes even better the next day after the flavors have had additional time to develop in the refrigerator.
10. Freeze Individual Portions
For convenient future meals, divide cooled leftovers into single-serving containers before freezing.
The smaller portions thaw faster and are easy to reheat for lunch or a quick dinner.
Common Mistakes to Avoid
1. Using Lean Beef
What happens:
The meat becomes dry and lacks the rich texture expected from beef tips.
Why it happens:
Lean cuts don’t contain enough connective tissue to benefit from long slow cooking.
How to avoid it:
Use chuck roast whenever possible.
How to fix it:
Serve with extra gravy, though the texture won’t be quite as tender.
2. Skipping the Browning Step
What happens:
The gravy tastes flatter and looks lighter in color.
Why it happens:
Without browning, the beef misses the caramelized flavors created during searing.
How to avoid it:
Take a few extra minutes to brown the meat before transferring it to the slow cooker.
3. Crowding the Skillet
What happens:
The beef steams instead of browning.
Why it happens:
Too much meat lowers the pan temperature and releases excess moisture.
How to avoid it:
Brown the beef in two or three batches.
4. Opening the Lid Too Often
What happens:
Cooking takes significantly longer.
Why it happens:
Heat escapes every time the lid is removed.
How to avoid it:
Keep the lid closed except when adding the cornstarch slurry near the end.
5. Adding Cornstarch Too Early
What happens:
The gravy may become overly thick or lose its smooth consistency after several hours.
Why it happens:
Cornstarch performs best when added near the end of cooking.
How to avoid it:
Mix the slurry during the last 20 to 30 minutes.
6. Over-Seasoning at the Beginning
What happens:
The finished gravy can become too salty as it concentrates during cooking.
Why it happens:
Several ingredients already contribute sodium.
How to avoid it:
Taste the gravy after cooking before adding additional salt.
7. Serving Immediately Without Resting
What happens:
The gravy may seem thinner than expected.
Why it happens:
It hasn’t had time to settle after cooking.
How to avoid it:
Let the dish rest for about 10 minutes before serving.
8. Cooking for Too Short a Time
What happens:
The beef remains firm and chewy.
Why it happens:
The connective tissue hasn’t fully broken down yet.
How to avoid it:
Continue cooking until the beef easily pulls apart with a fork.
Variations
Mushroom Beef Tips
Add 8 ounces of sliced cremini or baby bella mushrooms during the last 2 hours of cooking. They absorb the savory gravy while adding an earthy flavor that pairs beautifully with the beef.
Onion Lover’s Version
Double the amount of diced onion for a sweeter, richer gravy with even more slow-cooked flavor.
Garlic Lover’s Version
Increase the garlic to 6 cloves for a more pronounced garlic flavor without overpowering the dish.
Peppercorn Beef Tips
Stir in 1 teaspoon of freshly cracked black pepper during the final 30 minutes for a bolder, steakhouse-inspired gravy.
Herb-Forward Version
Add a sprig of fresh rosemary and a few sprigs of thyme while the beef cooks. Remove them before serving for a more aromatic gravy.
Gluten-Free Version
Replace the flour with a gluten-free flour blend or simply skip it during browning. Use certified gluten-free Worcestershire sauce and thicken the gravy with cornstarch as directed.
Dairy-Free Version
Omit the butter at the end or replace it with a dairy-free butter alternative. The gravy will still be rich and flavorful.
Vegetable Boost
Stir in peeled carrots or sliced mushrooms during the last half of the cooking time for a heartier one-pot meal without changing the recipe’s comforting character.
Storage Instructions
One of the best things about Crockpot Beef Tips with Gravy is how well it keeps. The beef stays tender, and the flavors continue to develop after a day in the refrigerator, making leftovers just as satisfying as the original meal.
Room Temperature
Don’t leave the beef and gravy at room temperature for more than 2 hours (or 1 hour if the room temperature is above 90°F/32°C).
Refrigerator
Allow the beef to cool slightly before transferring it to an airtight container.
Store in the refrigerator for up to 4 days.
For the best flavor and texture, keep the beef completely covered with gravy to prevent it from drying out.
Freezer
This recipe freezes exceptionally well.
Transfer cooled portions to freezer-safe containers or heavy-duty freezer bags, leaving a little room for expansion.
Freeze for up to 3 months.
Label each container with the preparation date for easy meal planning.
Best Storage Container
Glass airtight containers work especially well because they resist stains and odors while helping preserve the gravy’s flavor.
BPA-free plastic freezer containers are also a good option for frozen portions.
Food Quality Notes
The gravy may thicken after chilling, which is completely normal.
When reheated gently with a splash of beef broth or water, it returns to its original smooth consistency.
How to Reheat
Proper reheating keeps the beef tender and prevents the gravy from becoming too thick.
Stovetop (Recommended)
Transfer the beef and gravy to a saucepan over medium-low heat.
Add a few tablespoons of beef broth or water if the gravy has thickened too much during storage.
Stir occasionally until the beef is heated through.
Why this works: Gentle heat preserves the beef’s tender texture and allows the gravy to loosen gradually without separating.
Microwave
Place a serving into a microwave-safe bowl.
Cover loosely with a microwave-safe lid or damp paper towel.
Heat in 45-second intervals, stirring between each interval until hot.
If needed, stir in a tablespoon of broth before reheating.
Slow Cooker
If you’re reheating a larger batch for family dinner, return the beef and gravy to the slow cooker.
Heat on LOW for about 1 to 2 hours, stirring once or twice.
This method keeps the beef moist while warming it evenly.
Avoid High Heat
Boiling the gravy or using very high heat can tighten the beef fibers and make the meat less tender.
Gentle reheating always produces the best results.
Make-Ahead Instructions
This recipe is an excellent choice for preparing in advance because the flavors deepen as they rest.
One Day Ahead
Brown the beef and prepare the gravy mixture the day before.
Store the browned beef and the gravy mixture separately in the refrigerator.
The next morning, combine everything in the slow cooker and cook as directed.
Fully Cook Ahead
Prepare the recipe completely.
Allow it to cool before refrigerating.
Reheat gently on the stovetop or in the slow cooker just before serving.
Many home cooks find the gravy even richer the following day.
Freezer Meal Prep
Brown the beef first, then combine it with the onions and gravy ingredients in a freezer-safe bag.
Freeze for up to 3 months.
Thaw overnight in the refrigerator before transferring everything to the slow cooker and cooking as directed.
Serving Suggestions
This rich beef and gravy pairs well with simple sides that soak up every spoonful of sauce.
Starches
- Creamy mashed potatoes
- Buttered egg noodles
- Steamed white rice
- Garlic mashed potatoes
- Buttered wide noodles
- Creamy polenta
Vegetables
- Roasted green beans
- Steamed broccoli
- Honey-glazed carrots
- Buttered peas
- Roasted Brussels sprouts
- Garlic green beans
The fresh vegetables help balance the richness of the gravy.
Bread
Serve with:
- Warm dinner rolls
- Buttermilk biscuits
- Crusty French bread
- Homemade garlic bread
They’re perfect for soaking up the extra gravy left on the plate.
Salads
A crisp salad provides a refreshing contrast to the hearty beef.
Good options include:
- Simple garden salad
- Caesar salad
- Mixed greens with vinaigrette
- Cucumber and tomato salad
Drinks
Pair this comforting meal with:
- Unsweetened iced tea
- Sparkling water with lemon
- Fresh apple cider
- Light red wine (for those who enjoy wine with dinner)
Desserts
Finish the meal with a classic homemade dessert such as:
- Apple crisp
- Peach cobbler
- Chocolate brownies
- Vanilla ice cream
- Bread pudding
- Banana pudding
These simple desserts complement the comforting flavors of the beef without overwhelming the meal.
Frequently Asked Questions
Can I use stew meat instead of chuck roast?
Yes, but the results may vary. Chuck roast is more consistently marbled, making it the preferred choice for tender beef tips. Stew meat often contains a mix of different cuts, so some pieces may become tender sooner than others.
Why are my beef tips still tough?
Tough beef usually means it needs more time to cook. Slow cooking breaks down the connective tissue gradually. Continue cooking until the beef easily pulls apart with a fork rather than reducing the cooking time.
Can I make this recipe without browning the beef?
You can, but browning adds significant flavor and gives the gravy a richer color. If you’re short on time, the recipe will still work, but the finished dish won’t have the same depth of flavor.
Can I freeze leftovers?
Absolutely. Allow the beef and gravy to cool completely before transferring them to freezer-safe containers. Freeze for up to three months and thaw overnight in the refrigerator before reheating.
What’s the best way to thicken the gravy?
A cornstarch slurry added during the final 20 to 30 minutes of cooking produces the smoothest results. If the gravy is still thinner than you’d like, stir in a small additional slurry until it reaches your preferred consistency.
Can I prepare everything the night before?
Yes. Brown the beef, mix the gravy ingredients, and refrigerate them separately overnight. The next day, combine everything in the slow cooker and cook as directed.
What should I serve with Crockpot Beef Tips?
Creamy mashed potatoes, buttered egg noodles, steamed rice, roasted vegetables, and warm dinner rolls are all excellent choices because they pair well with the rich homemade gravy.
Can I make this recipe gluten-free?
Yes. Skip the flour used for coating the beef or replace it with a gluten-free flour blend. Make sure your Worcestershire sauce is certified gluten-free, then thicken the gravy with cornstarch as directed.
Can I cook this on HIGH instead of LOW?
Yes. Cooking on HIGH for about 4½ to 5 hours will produce good results, although cooking on LOW for approximately 8 hours generally creates the most tender beef and the richest flavor.
Key Takeaways
- Use well-marbled chuck roast for the most tender, flavorful beef.
- Brown the beef first to create a richer, deeper homemade gravy.
- Cook low and slow until the beef is easily pierced with a fork.
- Add the cornstarch slurry near the end for a smooth, glossy gravy.
- Leftovers store and reheat beautifully, making this recipe ideal for meal prep.
Quick Recipe Summary
Crockpot Beef Tips with Gravy is a comforting American slow cooker recipe featuring chunks of beef chuck roast simmered with onions, garlic, beef broth, and savory seasonings until they’re fork-tender. Browning the beef before slow cooking adds extra flavor, while a simple cornstarch slurry creates a rich, silky gravy that coats every bite. This easy recipe requires minimal hands-on preparation and is perfect for busy weeknights, family dinners, or make-ahead meals. Serve it over mashed potatoes, egg noodles, or rice for a hearty meal. Leftovers keep well in the refrigerator for up to four days and freeze successfully for future dinners.
More Recipes:
- Slow Cooker Pot Roast (Tender, Hearty & No-Fail Crockpot Dinner)
- Homemade Beef Stew Recipe (Tender & Rich Every Time)
- Braised Beef Short Ribs Recipe with Mashed Potatoes
- Easy Salisbury Steak with Onion Gravy and Mashed Potatoes (30-Minute Comfort Meal)
- Easy Weeknight Slow Cooker Dinners
Useful Links:
- USDA Safe Minimum Internal Temperatures
- USDA Leftovers and Food Storage
- FDA Food Safety During Preparation
- Cooperative Extension Guide to Baking Potatoes
- MyPlate Vegetable Serving Guidance