Homemade Beef Chili Recipe With Beans
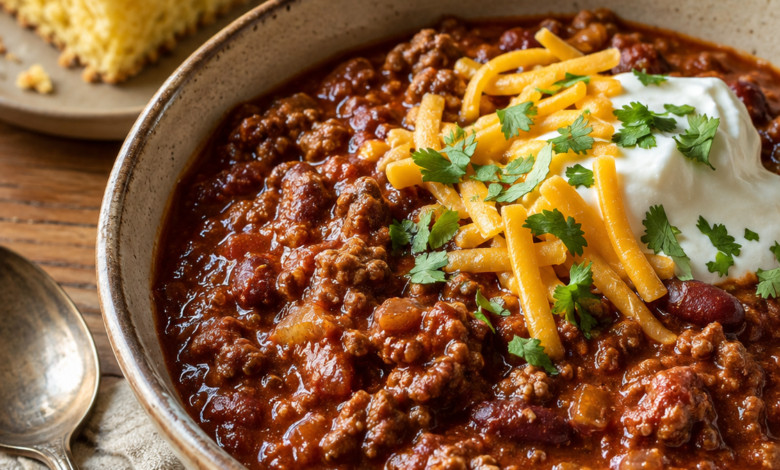
Quick Answer: This homemade beef chili combines browned ground beef, kidney beans, tomatoes, onion, garlic, and warm chili spices in one hearty pot. Browning the beef in batches builds deeper flavor, while simmering uncovered and lightly mashing a few beans creates a thick, spoonable texture without flour or cornstarch. Serve it with cheddar, sour cream, cilantro, and warm cornbread.
A good bowl of beef chili should be substantial enough to feel like dinner, with plenty of browned beef and beans in every spoonful and a sauce that clings rather than runs. This version is built around those basics: rich tomato flavor, savory ground beef, kidney beans, and enough spice to taste like chili without overwhelming the rest of the ingredients.
The method is straightforward enough for a weeknight, but a few small details make a noticeable difference. The beef is browned in batches instead of steamed in a crowded pot, the tomato paste and spices get a brief toast, and the chili simmers uncovered so excess moisture can escape naturally.
For the full comfort-food meal, serve it with warm brown sugar honey butter cornbread alongside the bowl.
Why This Homemade Beef Chili Works
Browning builds flavor. Using 85/15 ground beef gives the pot enough fat for good browning and a rich finished chili. Cooking the meat in two batches keeps the pan from becoming overcrowded.

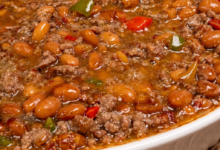

The sauce thickens naturally. There is no need for flour or cornstarch. An uncovered simmer reduces the tomato mixture, then a small portion of the beans is mashed and stirred back in for extra body.
The seasonings are balanced rather than overpowering. Chili powder and cumin provide the familiar foundation, while smoked paprika, oregano, black pepper, and optional cayenne round it out.
The finishing ingredients matter. Worcestershire sauce adds savory depth, while a tablespoon of apple cider vinegar stirred in at the end brightens the tomato-and-beef mixture without making it taste vinegary.
It is practical for leftovers. The chili reheats well, can be frozen without the toppings, and becomes even thicker after chilling.
Recipe Summary
| Recipe Detail | Information |
|---|---|
| Prep Time | 20 minutes |
| Cook Time | 1 hour |
| Rest Time | 10 minutes |
| Total Time | 1 hour 30 minutes |
| Servings | 6 generous servings |
| Course | Main Course |
| Cuisine | American |
| Difficulty | Easy |
| Estimated Calories | About 560 per serving with cheese and sour cream, excluding cornbread |
Ingredients
For the Beef Chili
- 1½ pounds 85/15 ground beef
- 1 large yellow onion, diced
- 4 garlic cloves, minced
- 2 tablespoons tomato paste
- 3 tablespoons chili powder
- 2 teaspoons ground cumin
- 1 teaspoon smoked paprika
- 1 teaspoon dried oregano
- ½ teaspoon cayenne pepper, optional
- 1½ teaspoons kosher salt, plus more to taste
- ½ teaspoon freshly ground black pepper
- 1 (28-ounce) can crushed tomatoes
- 1 (14.5-ounce) can diced tomatoes, undrained
- 1 cup low-sodium beef broth
- 2 teaspoons Worcestershire sauce
- 2 (15-ounce) cans dark red kidney beans, drained and rinsed
- 1 tablespoon apple cider vinegar
For Serving
- 1 cup freshly shredded cheddar cheese
- ¾ cup sour cream
- ¼ cup roughly chopped fresh cilantro
- Homemade or store-bought cornbread, cut into thick pieces
Ingredient Notes
Ground beef: An 85/15 blend provides enough rendered fat to brown well without making the finished chili excessively greasy. If you use 90/10 beef and the pot becomes dry, add about 1 tablespoon of neutral oil before cooking the onion.
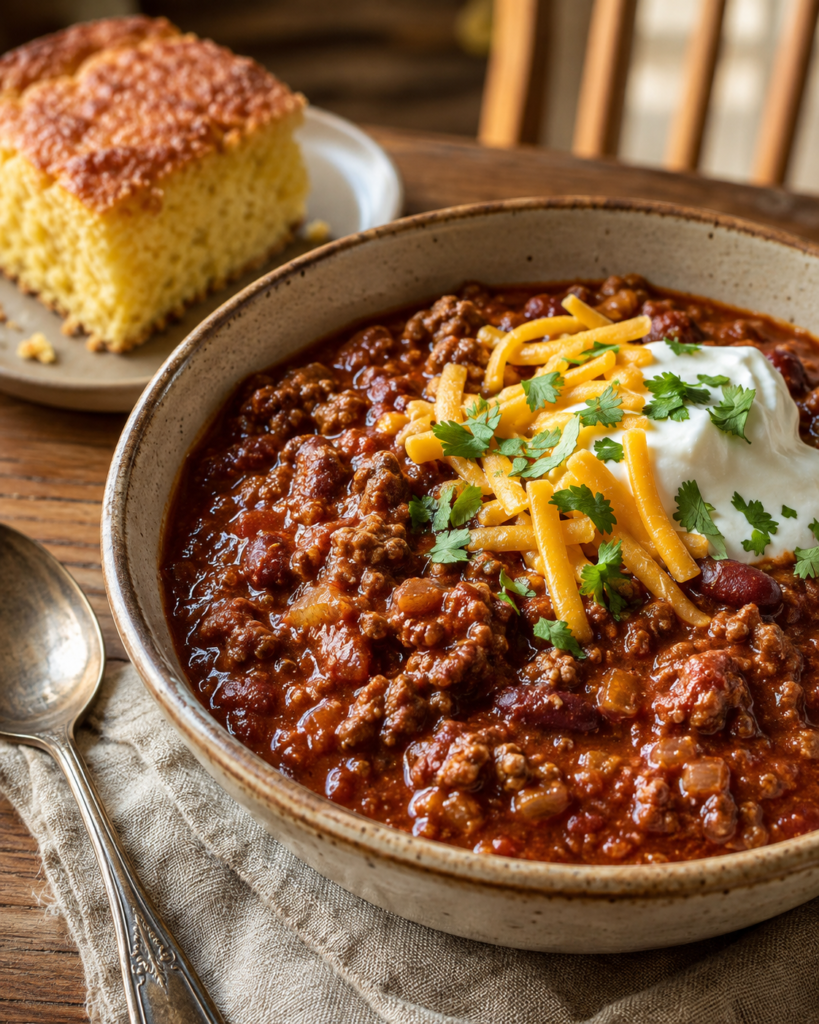
Kidney beans: Drain and rinse them before adding. They hold their shape well during the simmer and give this recipe the hearty beef-and-bean appearance shown in the finished dish.
Cheddar: Freshly shredded cheese softens more naturally over hot chili than many packaged pre-shredded varieties.
Cayenne: It is optional. Leave it out for a milder family-style chili or use the full amount for more noticeable heat.
Apple cider vinegar: This goes in after cooking. Its job is to sharpen the finished flavor, not make the chili taste sour.
Equipment
- Large Dutch oven or heavy-bottomed pot
- Wooden spoon
- Chef’s knife
- Cutting board
- Measuring cups and spoons
- Can opener
- Food thermometer
How to Make Homemade Beef Chili
1. Brown the Ground Beef
Heat a large Dutch oven over medium-high heat. Add half of the beef in a loose layer and let the bottom make good contact with the hot pot before breaking it into irregular crumbles.
Cook for about 4–5 minutes, until the meat develops browned areas rather than simply turning gray. Transfer it to a plate and repeat with the remaining beef.
2. Cook the Onion
Reduce the heat to medium. Add the diced onion to the rendered beef fat and cook for 5–6 minutes.
The onion should become translucent and lightly golden around the edges. If the pot is completely dry, add a small amount of neutral oil rather than letting the onion scorch.
3. Add the Garlic
Stir in the minced garlic and cook for about 30 seconds.
It should smell fragrant but remain pale. Garlic that becomes deeply browned at this stage can make the chili bitter.
4. Toast the Tomato Paste and Spices
Stir in the tomato paste, chili powder, cumin, smoked paprika, oregano, cayenne if using, salt, and black pepper.
Cook for 60–90 seconds while stirring. The tomato paste should darken slightly and the spices should become fragrant, but neither should burn.
5. Build the Chili Sauce
Pour in the crushed tomatoes, diced tomatoes with their juices, beef broth, and Worcestershire sauce.
Scrape the bottom of the pot with your spoon to loosen the browned bits left from the beef. Those concentrated bits dissolve into the sauce as it simmers.
6. Add the Beef and Kidney Beans
Return the browned ground beef and any juices from the plate to the pot. Stir in the drained kidney beans.
Bring everything to a gentle simmer rather than a hard boil. Make sure the ground beef is fully cooked to a safe internal temperature.
7. Simmer the Chili Uncovered
Reduce the heat to medium-low and simmer uncovered for 35–45 minutes. Stir about every 8–10 minutes, especially near the bottom of the pot.
The chili is ready for the next step when it looks noticeably thicker and a spoon drawn through the mixture leaves a path that remains visible briefly before filling in.
8. Thicken With Mashed Beans
Remove about ½ cup of beans from the chili and mash them lightly with a fork. Stir them back into the pot.
Simmer for another 5 minutes. The mashed beans release enough starch to give the sauce extra body while most of the beans remain intact.
9. Balance the Flavor
Take the pot off the heat and stir in 1 tablespoon apple cider vinegar.
Taste before adding anything else. Adjust the salt only if needed. The vinegar should brighten the chili, not stand out as a separate flavor.
10. Let the Chili Rest
Leave the chili uncovered for 10 minutes before serving.
This short rest gives the sauce time to settle and thicken further, which is especially useful if it looked slightly loose while bubbling.
11. Add the Toppings
Ladle the chili into deep bowls and top one area with shredded cheddar, sour cream, and chopped cilantro.
Leaving some of the chili uncovered keeps the browned beef, kidney beans, and thick red sauce visible. Serve the cornbread alongside rather than soaking it in the bowl.
How to Make Chili Thick Instead of Watery
The simplest way to thicken beef chili is to simmer it uncovered so excess liquid evaporates, then mash a small portion of the beans and stir them back in. Let the finished chili rest for about 10 minutes before serving. This recipe does not need flour or cornstarch to become thick and spoonable.
If the chili still looks watery after the suggested cooking time, keep it at a gentle uncovered simmer for several more minutes. Watch the bottom carefully and stir more frequently as it becomes thicker.
If you go too far and the chili becomes dense or pasty, add beef broth about ¼ cup at a time until the consistency loosens.
How Long Should Beef Chili Simmer?
For this recipe, the assembled chili simmers uncovered for 35–45 minutes, followed by another 5 minutes after the mashed beans are returned to the pot.
Use the clock as a guide, but pay attention to the sauce. Properly reduced chili should look thick and abundant rather than soupy, and the liquid should cling to the ground beef and beans.
Chef Tips
- Choose a wide, heavy pot. More surface area encourages evaporation and gives the beef more room to brown.
- Don’t break the beef too finely. Irregular crumbles give the finished chili a meatier texture.
- Use the rendered beef fat for the onion. It carries flavor into the next stage of the recipe.
- Watch the spices closely. Toasting improves their aroma, but burnt spices can make the entire pot taste bitter.
- Keep the simmer gentle. Aggressive boiling can break the kidney beans and reduce the sauce unevenly.
- Use low-sodium broth. It gives you better control over the final seasoning as the chili reduces.
- Grate the cheese shortly before serving. It will soften naturally over the hot chili without becoming a waxy layer.
- Add the vinegar off the heat. This keeps its brightening effect noticeable without turning harsh.
- Rest before judging thickness. Hot bubbling chili often appears looser than it will after 10 minutes off the stove.
- Store toppings separately. Fresh cheese, sour cream, cilantro, and cornbread are best added after the chili has been reheated.
Common Mistakes to Avoid
1. Crowding the Beef
Putting all 1½ pounds into a small hot pot at once traps moisture and encourages steaming. Brown it in two batches so more of the meat contacts the pan.
2. Breaking Up the Beef Too Soon
Constant stirring from the moment it enters the pot makes browning harder. Give the beef a little time against the hot surface before breaking it apart.
3. Burning the Garlic or Spices
Garlic needs only about 30 seconds, and the tomato paste and spices need roughly 60–90 seconds. If they turn very dark or smell acrid, the heat is too high.
4. Covering the Chili During the Main Simmer
A lid traps the moisture you are trying to remove. Simmer uncovered to produce the thick texture this recipe is designed for.
5. Boiling Too Aggressively
A hard boil can break the kidney beans and make the sauce reduce too quickly. Keep the surface at a steady, gentle simmer.
6. Serving Immediately Without Resting
The chili continues thickening off the heat. If it seems slightly loose, give it the full 10-minute rest before deciding it needs more reduction.
7. Reheating the Chili With All the Toppings
Sour cream, cilantro, and cheese are better added fresh. Store them separately and garnish each bowl after the chili is hot.
Variations
Spicier Beef Chili
Increase the cayenne to 1 teaspoon or cook one finely minced jalapeño with the onion. The basic texture and cooking method remain unchanged, but the finished chili will have considerably more heat.
Extra-Meaty Chili
Increase the ground beef to 2 pounds and reduce the kidney beans to one can. Add up to an extra ½ cup beef broth if the mixture becomes too dense during simmering.
Mild Family Chili
Omit the cayenne and reduce the chili powder to 2 tablespoons. The result still has a savory beef-and-tomato profile, but the chile flavor is gentler.
Dairy-Free Serving Option
The base chili contains no dairy. Simply leave off the cheddar and sour cream and serve it with cilantro and a dairy-free side if desired.
Storage Instructions
Room temperature: Do not leave cooked chili sitting at room temperature for extended periods. Cool leftovers promptly and refrigerate them in shallow containers.
Refrigerator: Keep the chili in an airtight container for up to 3–4 days.
Freezer: Freeze the chili without cheese, sour cream, cilantro, or cornbread for up to 3 months for best quality.
Best container: Shallow airtight containers work well because they cool efficiently and make portioning easier.
Keep toppings in separate containers so their texture stays fresh.
How to Reheat
The stovetop is the best option for reheating several servings because it lets you control the consistency as the chili warms. Place it in a saucepan over medium-low heat and stir occasionally.
Chili becomes thicker after refrigeration. If necessary, add 1–2 tablespoons of beef broth or water while reheating.
For one serving, microwave the chili in a covered microwave-safe bowl and stir partway through so it heats evenly. Add cheddar, sour cream, and cilantro only after reheating.
Make-Ahead Instructions
Beef chili is well suited to make-ahead preparation because the entire base recipe can be cooked before you need it.
Prepare the chili as directed, cool it properly, and refrigerate it in an airtight container. When ready to serve, reheat it gently on the stovetop and loosen it with a small amount of broth if necessary.
Do not add the cheese, sour cream, cilantro, or cornbread until serving. Keeping those components separate preserves the contrast between the hot chili and fresh toppings.
Serving Suggestions
A thick piece of golden cornbread is the most natural side for this bowl. The slight sweetness and crumbly texture work especially well with the savory tomato-and-beef sauce.
Other practical pairings include:
- A simple green salad with tangy dressing
- Crisp coleslaw
- Baked potatoes
- Tortilla chips for scooping
- Iced tea
- Lemonade
- Sparkling water with lime
- Cold cola
For another hearty one-pot beef dinner, Botainfo’s one-pan American goulash is a useful related recipe.
Frequently Asked Questions
Can I make beef chili ahead of time?
Yes. Cook the chili completely, cool it properly, and refrigerate it without the toppings. Reheat gently and add cheese, sour cream, cilantro, and cornbread only when serving.
Can I use pinto beans instead of kidney beans?
Yes. Pinto beans can replace the kidney beans, but they have a softer texture and milder flavor. The finished appearance will also be somewhat different from the original recipe.
Can I make this chili without beans?
You can, but removing both cans of beans changes the yield and makes the chili less thick. You may need to reduce the liquid further or adjust the quantity of beef.
Why is my chili watery?
It may not have simmered long enough, or it may have been covered during cooking. Simmer it uncovered, mash a small portion of the beans, and allow the finished chili to rest before serving.
Can I use lean ground beef?
Yes. If you use 90/10 ground beef, the chili will be slightly less rich. If there isn’t enough rendered fat left in the pot, add about 1 tablespoon of neutral oil before cooking the onion.
How spicy is this beef chili?
The base recipe has moderate chili flavor, with cayenne providing the optional heat. Omit the cayenne for a milder bowl or increase it if you prefer more spice.
Can I freeze beef chili with beans?
Yes. Freeze the cooled chili without the dairy toppings, cilantro, or cornbread in airtight containers for up to 3 months for best quality.
Can I double this recipe?
Yes, provided you use a pot large enough to brown the beef properly and hold the increased volume. A larger batch may need additional simmering time because there is more liquid to reduce.
Key Takeaways
- Brown the ground beef in batches to build deeper savory flavor.
- Simmer the chili uncovered and mash a few beans for a naturally thick sauce.
- Use 85/15 beef for a good balance of browning, richness, and moisture.
- Let the chili rest for 10 minutes before deciding whether the sauce needs further thickening.
- Store and reheat the chili separately from the cheddar, sour cream, cilantro, and cornbread.
Quick Recipe Summary
Homemade beef chili is made by browning 1½ pounds of ground beef, cooking onion and garlic, and briefly toasting tomato paste with chili powder, cumin, smoked paprika, oregano, and optional cayenne. Crushed tomatoes, diced tomatoes, beef broth, Worcestershire sauce, and kidney beans are then added and simmered uncovered until thick. Lightly mashing a small portion of the beans gives the sauce extra body without flour or cornstarch. Finish the chili with apple cider vinegar, rest it for 10 minutes, and serve with shredded cheddar, sour cream, cilantro, and warm cornbread.
More Recipes
- Brown Sugar Honey Butter Cornbread
- Creamy White Chicken Chili
- Homemade Beef Stew
- One-Pan American Goulash
- Ground Turkey Chili Mac
Useful Links
- USDA Safe Minimum Internal Temperatures
- USDA Leftovers and Food Storage
- FDA Food Safety During Preparation
- Cooperative Extension Guide to Baking Potatoes
- MyPlate Vegetable Serving Guidance