How Do You Make 3 Minute Fudge in the Microwave?
You make 3 Minute Fudge by melting chocolate chips, sweetened condensed milk, and butter in the microwave, stirring until smooth, then chilling until set.
No stovetop.
No candy thermometer.
No complicated sugar stages.
This recipe delivers smooth, creamy, rich chocolate fudge using simple ingredients and controlled microwave heating. It’s designed for busy days, last-minute guests, edible gifts, or serious chocolate cravings that need a fast solution.
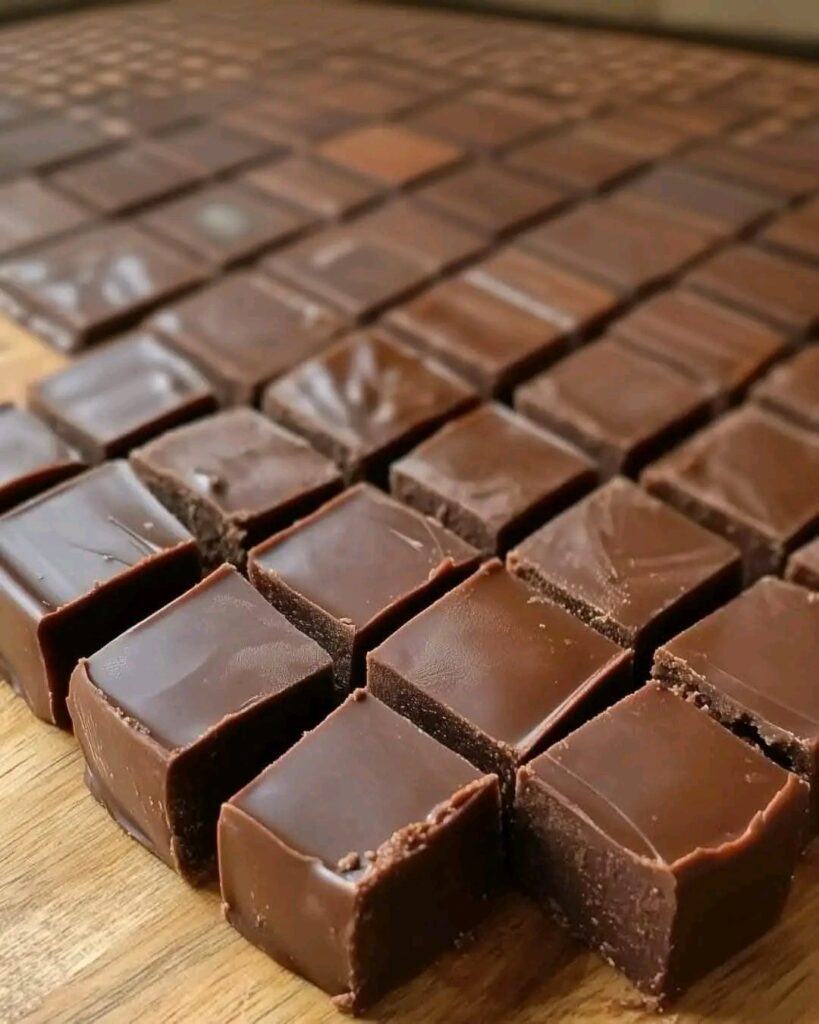
3 Minute Fudge (Easy Microwave Recipe)
What Is 3 Minute Fudge?
3 Minute Fudge is a microwave fudge recipe that takes about 3 minutes of active prep and 1 hour to chill.
Unlike traditional stovetop fudge, this version:
- Uses sweetened condensed milk for structure
- Requires no temperature monitoring
- Minimizes the risk of grainy texture
- Set firmly in the refrigerator
It’s beginner-friendly and highly customizable.
Why This Recipe Works Every Time
Fudge usually fails because of incorrect sugar temperatures or improper ratios. This recipe avoids both issues.
It works because:
- Sweetened condensed milk provides both sweetness and structure
- Chocolate chips melt smoothly and create body
- Butter adds richness and improves texture
- Microwave heating in short bursts prevents overheating
The result: consistent, smooth, sliceable fudge with no guesswork.
Ingredients (U.S. Measurements)
Yield: 16 squares
Active Prep Time: 3 minutes
Chill Time: 1 hour
You’ll need:
- 1 cup chocolate chips (semi-sweet, milk, or dark)
- 1 can (14 oz) sweetened condensed milk
- ¼ cup unsalted butter
- 1 teaspoon vanilla extract
- Pinch of salt
Optional Toppings
- Chopped nuts
- Sprinkles
- Mini marshmallows
- Flaky sea salt
Why Each Ingredient Matters
Chocolate Chips
- Provide structure and flavor
- Higher-quality chocolate = smoother, richer fudge
- Semi-sweet is the most balanced option
Sweetened Condensed Milk
- Essential for sweetness and stability
- Prevents crystallization and graininess
- Do not substitute evaporated milk
Butter
- Adds silkiness and clean slicing
- Enhances overall richness
Vanilla + Salt
- Vanilla deepens chocolate flavor
- Salt balances sweetness
Even small amounts significantly improve taste.
Step-by-Step Instructions
Step 1: Combine Ingredients
In a deep microwave-safe bowl, add:
- Chocolate chips
- Sweetened condensed milk
- Butter
Use a bowl large enough to allow stirring without spilling.
Step 2: Melt in Controlled Intervals
Microwave on high for 30 seconds. Stir thoroughly.
Continue heating in 15-second intervals, stirring after each round, until fully melted and smooth.
Important: Do not overheat. Stirring distributes heat and prevents scorching.
Step 3: Add Flavor
Stir in:
- Vanilla extract
- Pinch of salt
Mix until glossy and uniform.
Step 4: Pour and Spread
Line an 8×8-inch baking pan with parchment paper.
- Pour fudge into the pan
- Spread evenly with a spatula
- Add toppings if desired
Step 5: Chill Until Firm
Refrigerate for at least 1 hour, or until fully set.
Lift out using parchment and slice into squares.
Wipe the knife clean between cuts for neat edges.
Why the Microwave Method Works
Microwaves are ideal for this recipe because:
- Heat is applied in short bursts
- Stirring controls temperature
- Chocolate melts evenly
- There’s no sugar boiling stage
Controlled melting = smooth texture.
Pro Tips for Perfect Fudge
For consistently great results:
- Use quality chocolate chips
- Stir thoroughly between microwave intervals
- Avoid overheating
- Chill fully before slicing
- Use parchment paper for easy removal
Small details prevent common fudge mistakes.
Easy Flavor Variations
This base recipe is flexible. Keep the structure the same and adjust flavors.
Peanut Butter Fudge
Swirl in 2 tablespoons of creamy peanut butter before chilling.
Rocky Road Fudge
Fold in chopped nuts and mini marshmallows.
Mint Chocolate Fudge
Add ½ teaspoon mint extract and top with crushed mint candies.
White Chocolate Cranberry Fudge
Use white chocolate chips and add ½ cup dried cranberries.
Salted Caramel Fudge
Drizzle caramel sauce over the top and finish with flaky sea salt.
How to Serve 3 Minute Fudge
Because fudge is rich, smaller pieces work best.
Serve:
- Slightly chilled for clean slices
- At room temperature for a softer texture
- On dessert trays or gift platters
- Cut into bite-sized squares
Ideal for holidays, parties, bake sales, or quick treats.
Storage Instructions
Refrigerator
- Store in an airtight container
- Keeps up to 2 weeks
Freezer
- Wrap tightly in plastic wrap and foil
- Freeze up to 3 months
- Thaw overnight in the refrigerator
Proper storage maintains a smooth texture.
Frequently Asked Questions
Can I use evaporated milk instead?
No. Evaporated milk does not contain the sugar concentration needed for proper structure.
Why didn’t my fudge set?
Common reasons:
- Incorrect ingredient measurements
- Not enough chilling time
- Overheating the chocolate
Refrigerate longer before troubleshooting.
Can I make this dairy-free?
Yes. Use:
- Dairy-free chocolate chips
- Sweetened condensed coconut milk
- Plant-based butter
Can I double the recipe?
Yes. Use a 9×13-inch pan and spread evenly.
Is This Recipe Beginner-Friendly?
Yes. This recipe requires:
- A microwave
- A mixing bowl
- A spatula
- A refrigerator
No advanced skills. No specialty equipment.
Key Takeaways
- 3 Minute Fudge is a microwave-based, no-thermometer recipe.
- It uses chocolate chips, sweetened condensed milk, and butter for a reliable structure.
- Active prep takes about 3 minutes; chilling takes 1 hour.
- It stores well and freezes well.
- The base recipe supports multiple flavor variations.
When you need dessert fast—and you need it to work—this simple microwave fudge delivers smooth, rich results every time. 🍫