If you’re a fan of Oreos and cheesecake, this Oreo No-Bake Cheesecake is about to become your new favorite dessert. It’s rich, creamy, and packed with Oreo goodness in every bite. The best part? You don’t even need to turn on the oven! Perfect for birthdays, holidays, or just because, this dessert is a crowd-pleaser that’s incredibly easy to make. Let’s dive into this irresistible recipe.
Why You’ll Love This Recipe
- No Baking Required – Ideal for warm days when you don’t want to heat up the kitchen.
- Quick and Easy – Simple ingredients and minimal effort.
- Rich and Creamy – A perfect balance of sweetness and texture.
- Loaded with Oreos – Every bite is filled with cookie goodness.
Oreo No-Bake Cheesecake

Ingredients
For the Crust:
- 1 and 1/2 packs of edible Oreo cookie dough (or 24 Oreo cookies, crushed)
- 3 tablespoons unsalted butter, melted
For the Filling:
- 3 blocks (8 oz each) of cream cheese, softened
- 1 and 1/2 teaspoons vanilla extract
- 1 and 1/2 cups powdered sugar
- 16 oz Cool Whip, thawed
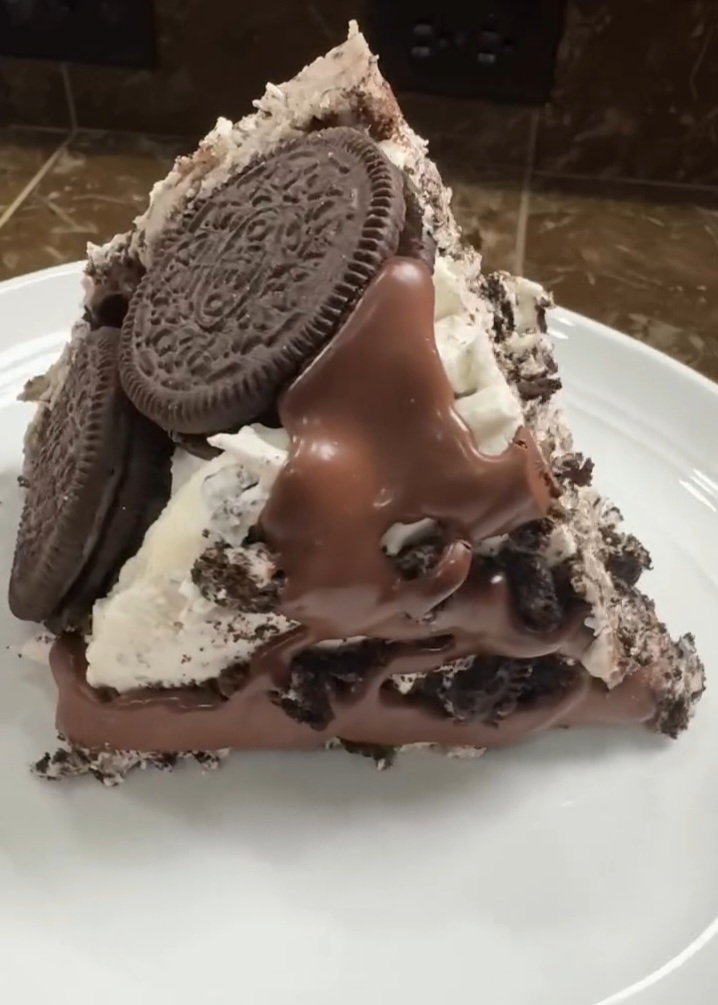
- 20 Oreos, crushed (some larger chunks for texture)
For the Ganache Topping:
- 1/2 cup heavy cream
- 1/2 cup semi-sweet chocolate chips
- 2–3 Oreos, crushed (for garnish)
Instructions
Step 1: Prepare the Crust
- Use Edible Oreo Dough – If you’re using store-bought edible Oreo cookie dough, press it evenly into the bottom of a 9-inch springform pan lined with parchment paper.
- Using Crushed Oreos Instead? – Blend 24 Oreos into fine crumbs, mix with melted butter, and press into the pan.
- Chill the crust in the fridge while you prepare the filling.
Step 2: Make the Cheesecake Filling
- In a large bowl, beat the softened cream cheese until smooth and creamy.
- Add the vanilla extract and powdered sugar, mixing until well combined.
- Gently fold in the Cool Whip, making sure not to overmix.
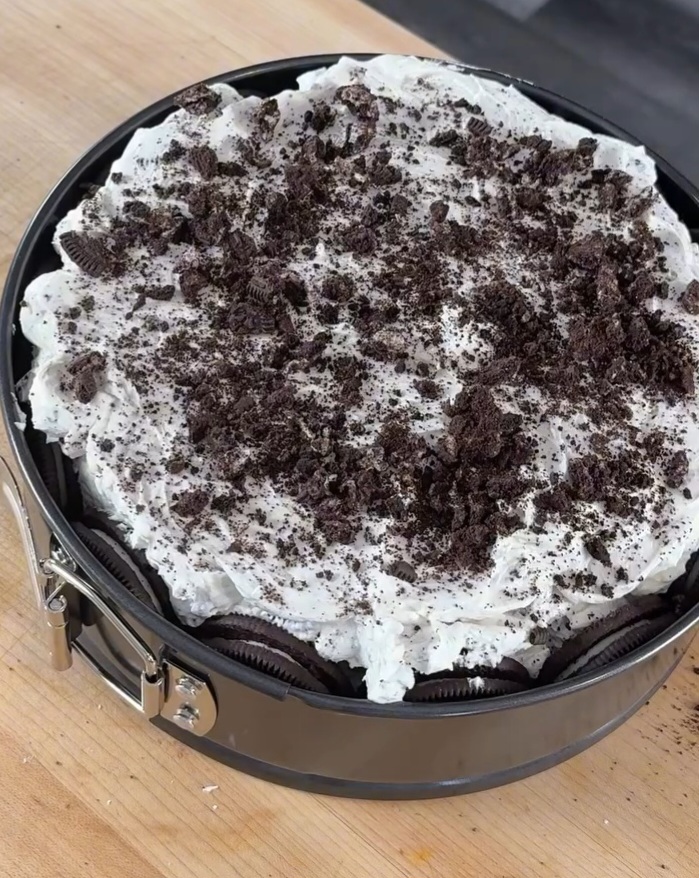
- Crush 20 Oreos into small chunks (not too fine) and fold them into the cheesecake mixture for extra crunch.
- Pour the filling over the chilled crust and smooth the top with a spatula.
Step 3: Make the Ganache Topping
- In a small saucepan, bring the heavy cream to a slight simmer.
- Remove from heat and add the semi-sweet chocolate chips.
- Whisk until smooth, then allow it to cool slightly before drizzling over the cheesecake.
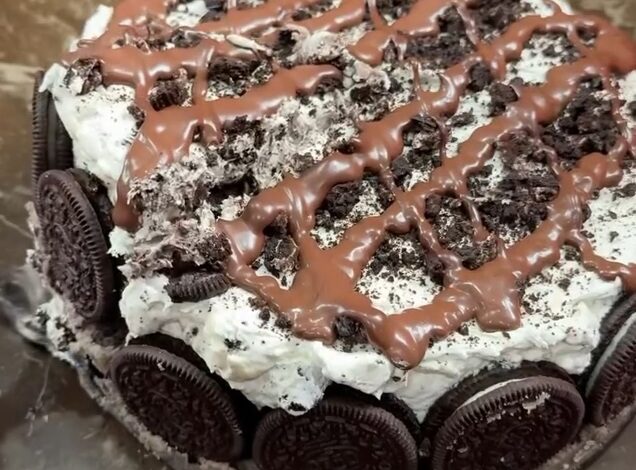
- Transfer the ganache into a zip-top bag, snip off the corner, and drizzle it over the cheesecake in a decorative pattern.
Step 4: Add Final Touches & Chill
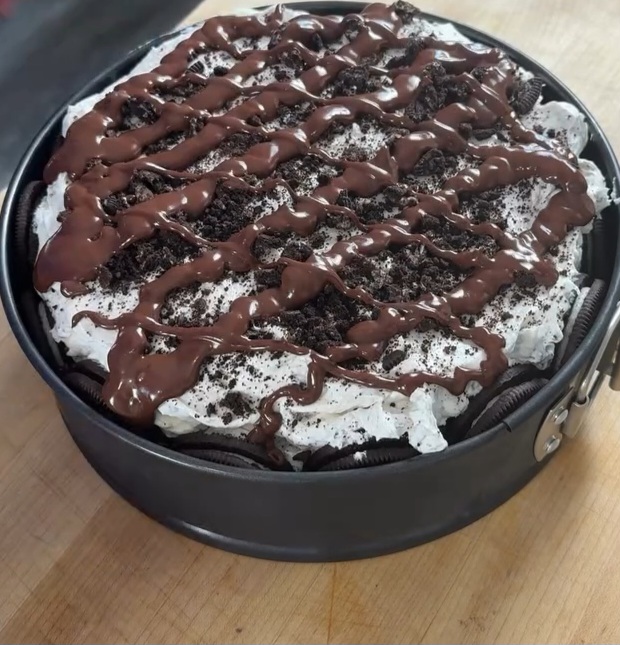
- Sprinkle the top with 2–3 crushed Oreos for extra texture and flavor.
- Refrigerate for at least 6 hours or preferably overnight to allow the flavors to meld.
Serving & Storage Tips
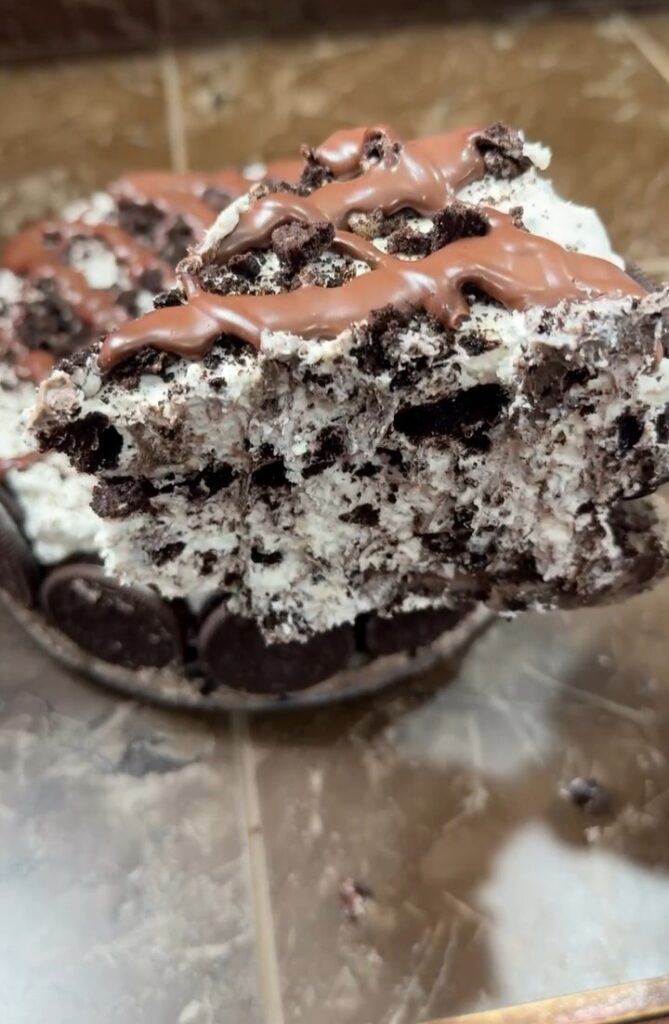
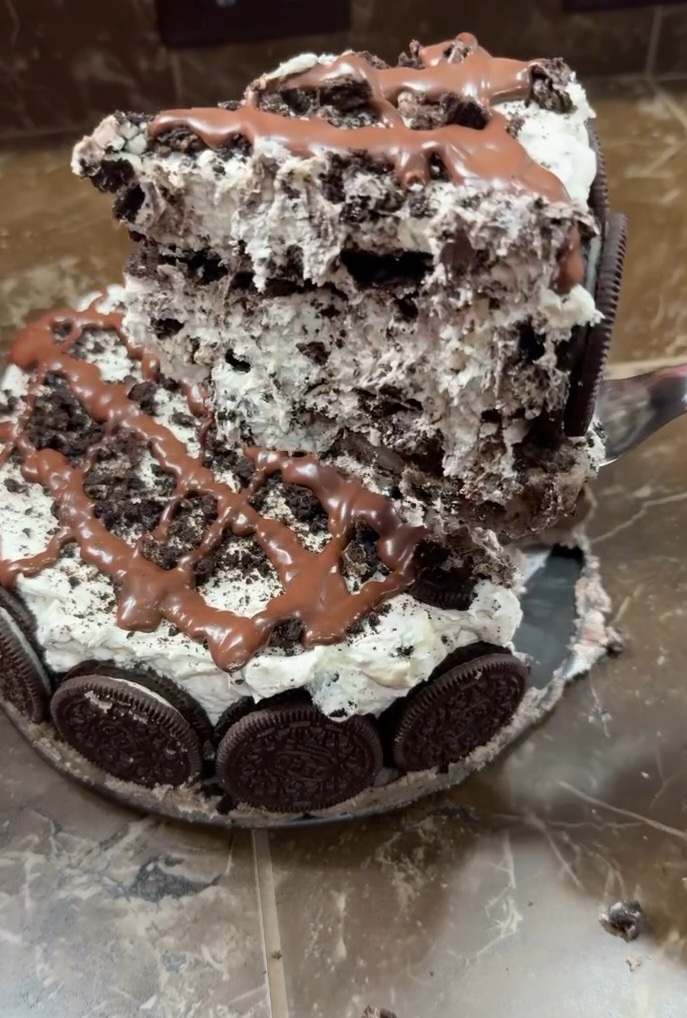
- Serving: Use a sharp knife to slice, wiping the blade between cuts for clean slices.
- Storage: Keep refrigerated for up to 4 days in an airtight container.
- Freezing: Wrap tightly in plastic wrap and store for up to 2 months. Thaw overnight before serving.
Frequently Asked Questions
Can I Use Homemade Whipped Cream Instead of Cool Whip?
Absolutely! Substitute 3 cups of homemade whipped cream for Cool Whip.
What If I Don’t Have a Springform Pan?
You can use a deep dish pie pan or a square baking dish lined with parchment paper.
Can I Make This Recipe Gluten-Free?
Yes! Just use gluten-free Oreos and ensure your other ingredients are gluten-free.
This Oreo No-Bake Cheesecake is the perfect balance of rich, creamy, and chocolatey goodness. Whether you’re making it for a special occasion or just to satisfy a sweet craving, it’s guaranteed to impress. Try it out and let us know how it turns out!