Quick Answer
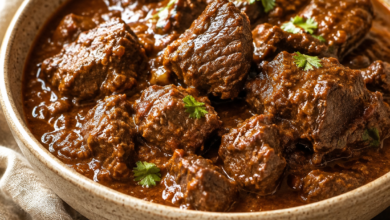
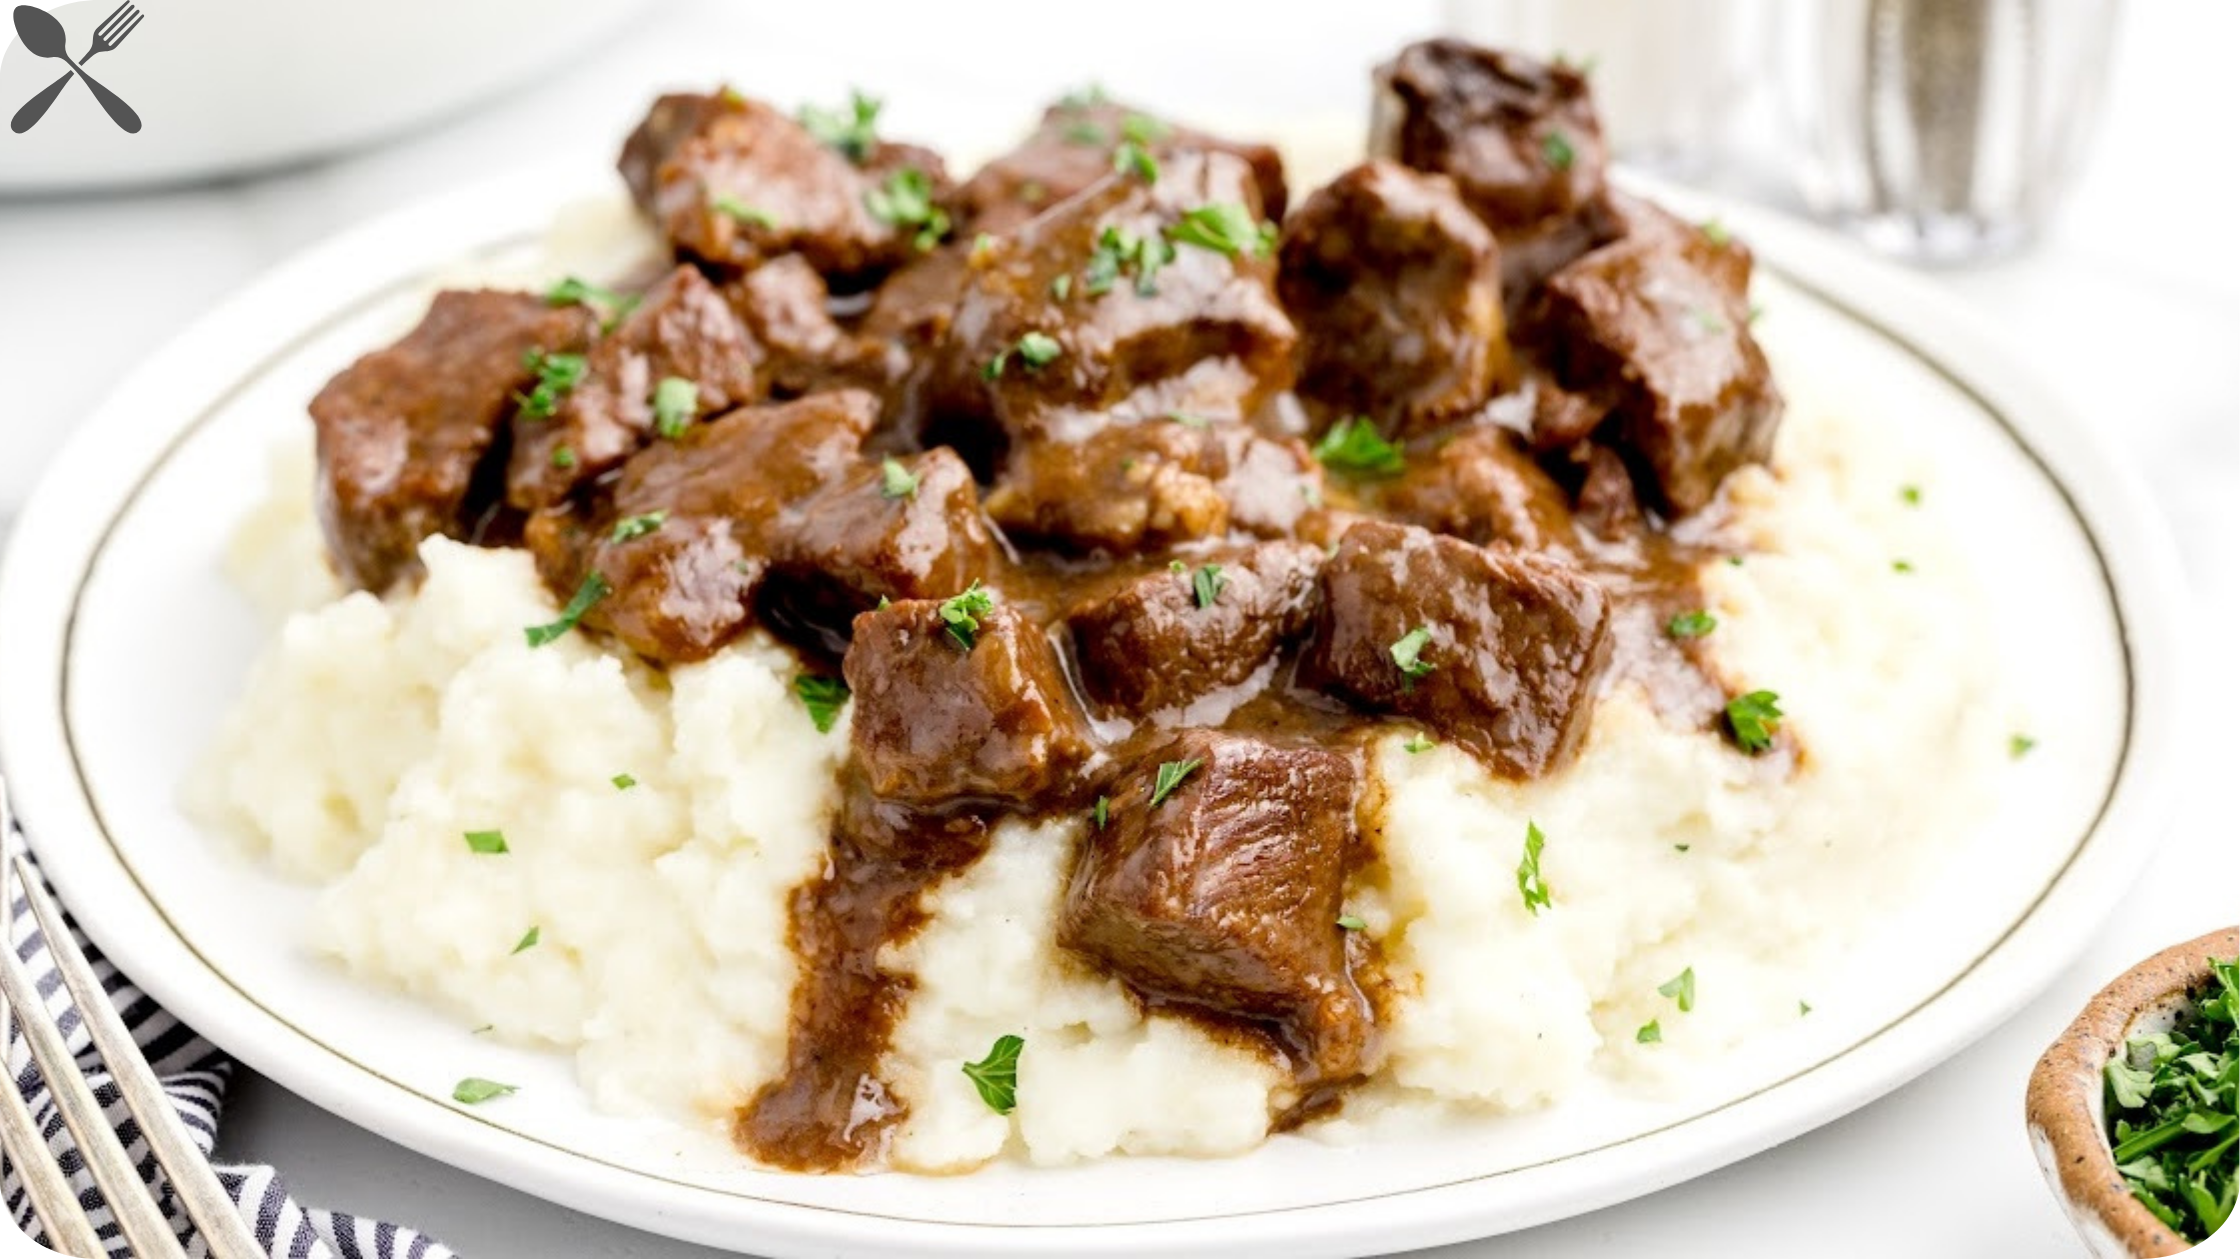
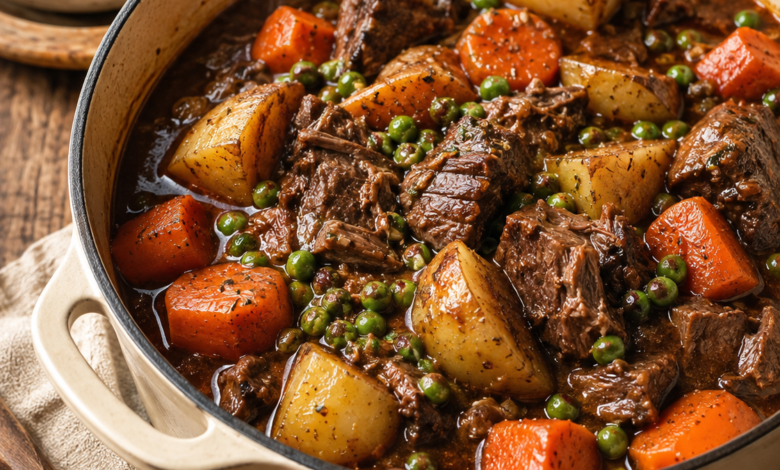
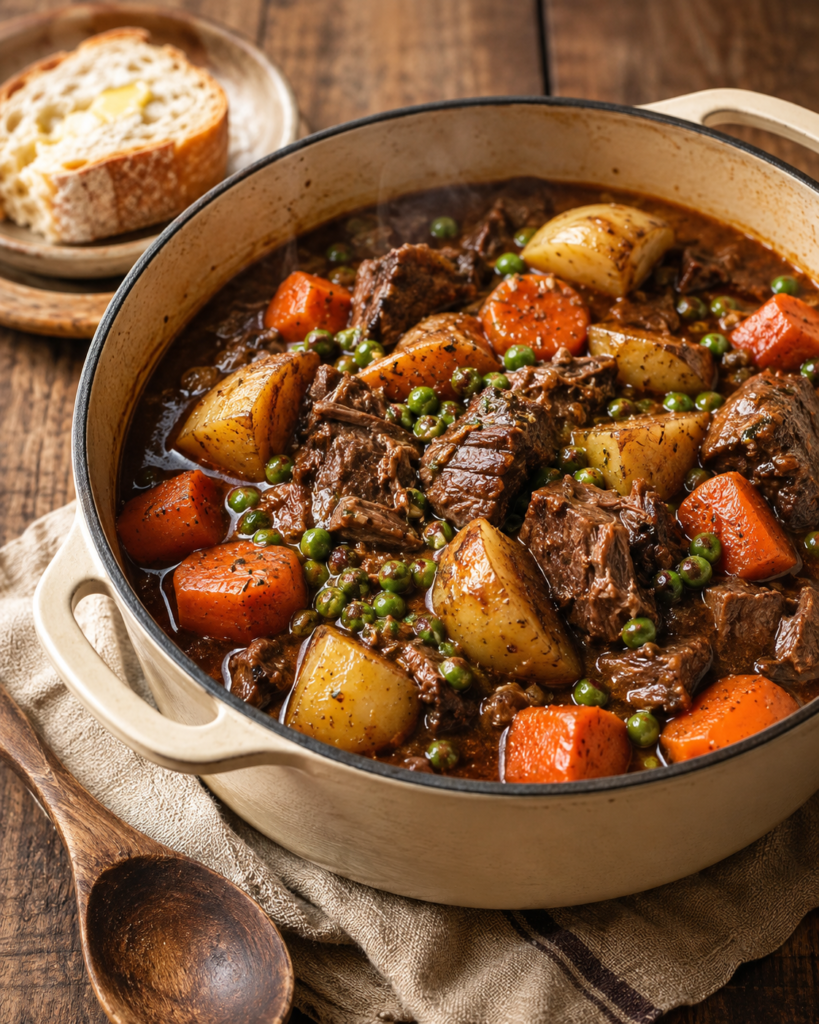
This homemade beef stew is a hearty one-pot meal made with tender beef chuck, potatoes, carrots, peas, and a rich, savory gravy that’s slowly simmered until every bite is full of flavor. It’s an easy recipe for home cooks, perfect for family dinners, meal prep, or chilly evenings when you’re craving classic comfort food.
Homemade Beef Stew Recipe
Few meals are as comforting as a pot of homemade beef stew slowly simmering on the stove. With fork-tender beef, hearty vegetables, and a rich gravy that’s perfect for soaking up with crusty bread, it’s the kind of meal that never goes out of style. Whether you’re cooking for a cozy weeknight dinner or preparing a meal to enjoy throughout the week, this recipe delivers dependable results using simple pantry ingredients and easy techniques.
One of the biggest reasons this recipe works so well is its focus on timing. Instead of cooking every ingredient together from the beginning, the vegetables are added in stages so each one reaches the ideal texture. The result is tender beef, potatoes that stay intact, carrots with just the right amount of bite, and bright green peas that keep their fresh color.
If you enjoy classic American comfort food, you may also like Best Pot Roast Dinner Recipe with Classic Sides, another hearty meal that’s perfect for slow cooking and family dinners.
Even if you’ve never made beef stew before, you’ll find the process straightforward. Each step explains what to look for along the way, helping you build flavor naturally while avoiding common mistakes that can leave stew with tough meat or bland broth.



Why This Recipe Works
Great beef stew isn’t complicated, but a few small techniques make a noticeable difference. This recipe focuses on those details so you can consistently achieve tender meat, rich gravy, and perfectly cooked vegetables.
Browning Builds Deep Flavor
The first step is taking the time to brown the beef well. Those browned bits that develop on the bottom of the pot create the foundation of the stew’s deep, savory flavor once they’re dissolved into the broth.
Chuck Roast Becomes Exceptionally Tender
Beef chuck roast is ideal because it contains enough marbling and connective tissue to become incredibly tender during a long, gentle simmer. As it cooks, the collagen gradually melts into the broth, creating a naturally rich texture without requiring heavy cream or excessive thickening.
Vegetables Are Cooked at the Right Time
Adding potatoes, carrots, and peas in stages keeps every vegetable at its best. Potatoes become creamy without falling apart, carrots stay pleasantly tender instead of mushy, and peas retain their fresh color and sweetness.
A Rich Gravy Without Being Heavy
A small amount of tomato paste adds depth and balance while Worcestershire sauce enhances the beefy flavor. The final cornstarch slurry thickens the broth into a glossy gravy that coats every ingredient without becoming overly thick or pasty.
Beginner-Friendly Instructions
Each cooking stage includes visual cues so you know exactly what success looks like. Instead of simply telling you to cook for a certain amount of time, the recipe explains what to watch for—from properly browned beef to gravy that lightly coats the back of a spoon. That makes the recipe easier to follow and much more forgiving for new home cooks.
Perfect for Meal Prep
Like many braised dishes, this stew develops even more flavor after resting overnight in the refrigerator. It’s just as delicious reheated the next day, making it an excellent choice for meal prep or preparing ahead for busy evenings.
Recipe Summary
| Recipe Details | |
|---|---|
| Prep Time | 25 minutes |
| Cook Time | 2 hours 20 minutes |
| Rest Time | 10 minutes |
| Total Time | 2 hours 55 minutes |
| Servings | 6 generous servings |
| Course | Main Course |
| Cuisine | American |
| Difficulty | Easy to Intermediate |
| Estimated Calories | About 495 calories per serving |
Ingredients
Beef
- 2 pounds beef chuck roast, trimmed and cut into 1½-inch cubes
- 1½ teaspoons kosher salt
- 1 teaspoon freshly ground black pepper
- 2 tablespoons all-purpose flour
- 2 tablespoons vegetable oil
Vegetables
- 1 large yellow onion, diced
- 3 garlic cloves, minced
- 5 medium carrots, peeled and cut into large chunks
- 1 pound baby Yukon Gold potatoes, halved or quartered
- 1 cup frozen green peas
Broth & Seasonings
- 3 cups low-sodium beef broth
- 1 cup water
- 2 tablespoons tomato paste
- 1 tablespoon Worcestershire sauce
- 1 teaspoon dried thyme
- 1 teaspoon dried rosemary
- 2 bay leaves
- 1 teaspoon smoked paprika
- ½ teaspoon onion powder
- ½ teaspoon garlic powder
Thickening Slurry
- 2 tablespoons cornstarch
- 2 tablespoons cold water
To Finish
- 1 tablespoon unsalted butter
- 1 tablespoon chopped fresh parsley (optional)
Ingredient Notes
A few simple ingredient choices make a noticeable difference in the finished stew. Here’s what to keep in mind before you start cooking.
Beef Chuck Roast
Chuck roast is the best choice for this recipe because it contains enough marbling and connective tissue to become incredibly tender during a long, slow simmer. Avoid lean cuts like sirloin or round roast, which can dry out and become chewy.
Yukon Gold Potatoes
Yukon Gold potatoes hold their shape well while developing a creamy interior. Red potatoes also work nicely, while russet potatoes tend to break down more easily and create a softer stew.
Low-Sodium Beef Broth
Using low-sodium broth gives you better control over the seasoning. Since the liquid reduces during cooking, it’s easier to adjust the salt at the end than to fix an overly salty stew.
Tomato Paste
Don’t skip the tomato paste. It won’t make the stew taste like tomatoes—instead, it deepens the color and adds subtle richness after being cooked with the onions and garlic.
Worcestershire Sauce
Just one tablespoon adds layers of savory flavor that complement the beef without overpowering the stew.
Fresh Garlic
Freshly minced garlic provides a brighter, more natural flavor than garlic powder alone. The small amount of garlic powder in the seasoning blend simply reinforces that flavor throughout the broth.
Cornstarch Slurry
Always mix the cornstarch with cold water before adding it to the hot stew. Stirring dry cornstarch directly into the pot will create lumps that are difficult to remove.
Frozen Peas
Frozen peas are ideal because they’re picked and frozen at peak freshness. Add them only during the final few minutes of cooking so they stay bright green and slightly sweet.
Equipment
You don’t need specialized equipment to make this recipe. A few dependable kitchen tools are all that’s required.
- 5½- to 7-quart Dutch oven or heavy-bottomed soup pot
- Chef’s knife
- Cutting board
- Measuring cups
- Measuring spoons
- Wooden spoon
- Small mixing bowl for the cornstarch slurry
- Whisk
- Ladle
- Paper towels for drying the beef
Equipment Tips
If you don’t own a Dutch oven, a large heavy-bottomed stockpot works well. The key is using cookware that distributes heat evenly so the stew can simmer gently without scorching.
A wooden spoon is especially helpful for scraping the browned bits from the bottom of the pot after searing the beef. Those flavorful bits become part of the rich gravy and are one of the secrets to a deeply satisfying homemade stew.
With the ingredients prepared and the equipment ready, you’re set to start building layers of flavor that transform simple ingredients into a hearty homemade beef stew.
Step-by-Step Instructions
These detailed instructions are designed to help you build flavor gradually while making it easy to recognize each stage of the cooking process. If this is your first time making homemade beef stew, don’t worry—the visual cues throughout the recipe will help you know when you’re on the right track.
1. Prepare and Season the Beef
Pat the beef cubes dry with paper towels until no excess moisture remains. Dry meat browns much better than damp meat.
In a large bowl, toss the beef with the kosher salt, black pepper, and flour until every piece is lightly coated.
Why this matters
The flour creates a thin coating that encourages better browning and later helps give the stew its rich, velvety consistency.
What success looks like
- Every cube has a light dusting of flour.
- No wet spots remain.
- There are no thick clumps of flour.
Watch out for
Adding too much flour can make the finished gravy taste pasty.
2. Brown the Beef
Heat the vegetable oil in a large Dutch oven over medium-high heat until it shimmers.
Working in two or three batches, arrange the beef in a single layer without overcrowding the pot.
Cook for about 3–4 minutes per side, turning only after a deep brown crust develops.
Transfer each batch to a clean plate before browning the next.
Why this matters
Proper browning develops hundreds of flavor compounds that give homemade beef stew its rich, savory taste.
What success looks like
- Deep golden-brown crust
- Rich caramelized color
- Beef releases easily from the pan once properly browned
Watch out for
If the beef releases a lot of liquid instead of browning, the pot is overcrowded. Brown fewer pieces at a time.
3. Build the Flavor Base
Reduce the heat to medium.
Add the diced onion to the same pot and cook for about 5 minutes, stirring occasionally, until softened and translucent.
Stir in the minced garlic and cook for 30 seconds, just until fragrant.
Add the tomato paste and cook for another 2 minutes, stirring constantly.
Why this matters
Cooking the tomato paste concentrates its flavor and removes any raw acidity, creating a richer, deeper broth.
What success looks like
- Onions become soft and translucent.
- Garlic smells fragrant but isn’t browned.
- Tomato paste darkens slightly.
Watch out for
Burned garlic can make the entire stew taste bitter. Keep it moving once it’s added.
4. Deglaze the Dutch Oven
Pour about ½ cup of the beef broth into the hot pot.
Use a wooden spoon to scrape every browned bit from the bottom.
Once the bottom of the pot is clean, return the browned beef and any juices back into the Dutch oven.
Add:
- Remaining beef broth
- Water
- Worcestershire sauce
- Thyme
- Rosemary
- Smoked paprika
- Onion powder
- Garlic powder
- Bay leaves
Bring everything to a gentle simmer.
Why this matters
Those browned bits contain concentrated flavor that transforms the broth into a rich homemade gravy.
What success looks like
- The broth becomes a deep brown color.
- No browned bits remain stuck to the bottom.
- Gentle bubbles begin forming around the edges of the pot.
Watch out for
A rapid boil can toughen the beef. Aim for a slow, steady simmer instead.
5. Slowly Braise the Beef
Cover the Dutch oven with the lid slightly ajar.
Reduce the heat to low and let the stew simmer gently for 1 hour and 30 minutes.
Stir every 20–30 minutes to make sure nothing sticks to the bottom.
Why this matters
Chuck roast becomes tender through slow braising. Giving it enough time allows the connective tissue to break down naturally, creating juicy beef and a richer broth.
What success looks like
- The beef is noticeably more tender.
- The broth smells rich and savory.
- Gentle steam rises steadily.
- Small bubbles break the surface occasionally.
Watch out for
If the stew is boiling vigorously, reduce the heat. A gentle simmer keeps the meat tender and prevents the liquid from reducing too quickly.
At this stage, your kitchen should already smell rich and comforting, and the broth will have developed the deep savory base that makes homemade beef stew so satisfying. The vegetables come next, followed by thickening the gravy and adding the finishing touches that bring everything together.
6. Add the Potatoes
Once the beef is beginning to turn tender, stir the halved or quartered Yukon Gold potatoes into the stew.
Cover the pot again and continue simmering for 20 minutes.
Why this matters
Potatoes need enough time to become creamy inside while still holding their shape. Adding them after the beef has already cooked prevents them from becoming overly soft.
What success looks like
- Potatoes are easily pierced with a fork.
- The edges remain intact.
- They don’t crumble when stirred.
Watch out for
Cutting the potatoes too small can cause them to break apart during the final simmer.
7. Add the Carrots
Stir the carrot chunks into the stew.
Continue simmering, uncovered, for another 20–25 minutes, stirring occasionally.
Why this matters
Carrots cook more quickly than the beef but slightly slower than peas. Adding them now keeps them tender while preserving their color and structure.
What success looks like
- Carrots are tender with slight resistance.
- Their bright orange color remains vibrant.
- They stay whole instead of falling apart.
Watch out for
Thin carrot slices soften too quickly. Larger chunks create a heartier stew and better match the finished appearance.
8. Thicken the Gravy
In a small bowl, whisk together the cornstarch and cold water until completely smooth.
Slowly pour the slurry into the simmering stew while stirring constantly.
Continue cooking for 3–5 minutes.
Why this matters
The slurry thickens the broth into a silky gravy that coats every ingredient without becoming overly heavy.
What success looks like
- The gravy becomes glossy.
- It lightly coats the back of a spoon.
- The vegetables remain visible instead of disappearing into an overly thick sauce.
Watch out for
Never pour dry cornstarch directly into the stew. It will form stubborn lumps.
9. Add the Peas
Stir in the frozen peas during the final 2–3 minutes of cooking.
They only need enough time to heat through.
Why this matters
Adding peas at the very end keeps them sweet, tender, and bright green while adding a fresh pop of color to the finished dish.
What success looks like
- Peas are hot but still vibrant.
- They remain slightly firm.
- Their color contrasts beautifully with the rich brown gravy.
Watch out for
Cooking peas too long dulls their color and softens their texture.
10. Finish the Stew
Remove the bay leaves.
Stir in the butter until fully melted.
Taste the stew and adjust the seasoning with additional salt and freshly ground black pepper if needed.
If using fresh parsley, sprinkle it over the stew just before serving.
Allow the stew to rest for 10 minutes before ladling it into bowls.
Why this matters
The butter adds a silky finish to the gravy, while the short resting period allows the flavors to settle and the sauce to thicken naturally.
What success looks like
Your finished stew should have:
- Fork-tender chunks of beef
- Creamy potatoes that hold their shape
- Tender carrots
- Bright green peas
- A glossy, rich brown gravy
- A deep savory aroma
Chef Tips
These practical tips can help take your beef stew from good to exceptional.
1. Brown the Beef in Small Batches
Giving each piece plenty of space allows it to develop a rich crust instead of steaming. The extra few minutes are well worth the deeper flavor.
2. Let the Pot Do the Work
A slow, gentle simmer produces more tender beef than a vigorous boil. Patience is one of the most important ingredients in a great stew.
3. Taste Near the End
As the stew cooks, the liquid reduces and flavors become more concentrated. Waiting until the end to adjust the seasoning helps prevent an overly salty result.
4. Cut Everything Evenly
Uniform pieces of beef and vegetables cook at a similar rate, giving the stew a more consistent texture and a better presentation.
5. Don’t Rush the Tomato Paste
Cooking the tomato paste for a couple of minutes before adding the broth deepens its flavor and removes any raw taste.
6. Stir Occasionally
A quick stir every 20 to 30 minutes helps prevent sticking without breaking apart the vegetables.
7. Rest Before Serving
Allowing the stew to rest for about 10 minutes gives the gravy time to settle and slightly thicken, creating a richer texture.
8. Make It a Day Ahead
Like many braised dishes, homemade beef stew often tastes even better the next day after the flavors have had time to meld together in the refrigerator.
9. Keep Extra Broth Nearby
If the stew reduces more than expected during cooking, add a small splash of warm beef broth to maintain the perfect consistency without diluting the flavor.
10. Garnish Simply
A little chopped fresh parsley adds color and freshness, but avoid heavy garnishes that compete with the stew itself. The beef and rich gravy should remain the stars of the dish.
Common Mistakes to Avoid
Even simple recipes can run into problems if a few key steps are rushed. Here are the most common mistakes when making homemade beef stew, why they happen, and how to avoid them.
1. Skipping the Browning Step
What happens
The stew tastes flat and lacks the rich, deep flavor that makes homemade beef stew so satisfying.
Why it happens
Browning creates flavorful caramelized bits on the bottom of the pot that later dissolve into the broth.
How to avoid it
Brown the beef in batches over medium-high heat until each piece develops a deep golden-brown crust.
How to fix it
If you’ve already skipped browning, let the stew simmer a little longer and adjust the seasoning, but it won’t fully replace the flavor developed during searing.
2. Crowding the Pot
What happens
The beef steams instead of browning.
Why it happens
Too many pieces in the pot lower the temperature and release excess moisture.
How to avoid it
Brown only enough beef to leave a little space between each piece.
How to fix it
Remove some of the beef and continue browning the remaining pieces properly.
3. Boiling Instead of Simmering
What happens
The beef becomes firmer than it should, and the vegetables begin to break apart.
Why it happens
High heat tightens muscle fibers and reduces the broth too quickly.
How to avoid it
Maintain only a gentle simmer with small bubbles rising occasionally.
How to fix it
Lower the heat immediately and continue cooking slowly until the beef becomes tender.
4. Adding All the Vegetables at Once
What happens
Some vegetables become mushy while others lose their color and texture.
Why it happens
Each vegetable requires a different cooking time.
How to avoid it
Add potatoes first, carrots later, and peas during the final few minutes.
How to fix it
The texture cannot be completely restored, but serving immediately prevents further softening.
5. Thickening Too Early
What happens
The gravy becomes too thick before the vegetables finish cooking.
Why it happens
Cornstarch reaches its full thickening power quickly.
How to avoid it
Wait until the vegetables are fully cooked before adding the slurry.
How to fix it
Stir in a little warm beef broth until the consistency becomes smooth again.
6. Over-Seasoning Early
What happens
The finished stew tastes overly salty.
Why it happens
The broth naturally reduces during cooking, concentrating the seasoning.
How to avoid it
Season lightly at the beginning and adjust the final seasoning after the stew finishes cooking.
How to fix it
Adding a little more broth or a few extra potatoes can help balance excessive saltiness.
7. Serving Immediately
What happens
The gravy seems thinner, and the flavors haven’t fully blended.
Why it happens
The stew needs a few minutes to settle after cooking.
How to avoid it
Allow it to rest for about 10 minutes before serving.
How to fix it
Simply wait a few minutes before ladling into bowls.
Variations
One of the best things about homemade beef stew is how easily it can be adapted while still keeping its comforting character.
Slow Cooker Version
Brown the beef and cook the onions, garlic, and tomato paste as directed.
Transfer everything except the peas, butter, and slurry to a slow cooker.
Cook:
- Low: 7–8 hours
- High: 4–5 hours
Add the potatoes during the final 2 hours, carrots during the last 90 minutes, peas during the last 10 minutes, and stir in the slurry during the last 20 minutes.
The result is just as rich and tender with very little hands-on cooking.
Instant Pot Version
Use the Sauté function to brown the beef and cook the aromatics.
Pressure cook the beef and broth for 35 minutes on High Pressure with a 15-minute natural release.
Add the potatoes and carrots, then cook for another 4 minutes before a quick release.
Finish with the slurry, peas, and butter using the Sauté setting.
Mushroom Beef Stew
Add 8 ounces of sliced cremini mushrooms after cooking the onions.
They deepen the savory flavor while adding another hearty texture.
Red Wine Version
Replace 1 cup of beef broth with 1 cup of dry red wine.
Allow the wine to simmer for several minutes before adding the remaining broth.
This produces an even richer, more robust gravy.
Extra Vegetable Version
Add:
- celery
- parsnips
- turnips
- pearl onions
These vegetables complement the beef without changing the overall character of the stew.
Gluten-Free Version
Replace the flour with a gluten-free flour blend or omit it entirely and use only the cornstarch slurry for thickening.
Always verify that your Worcestershire sauce and beef broth are certified gluten-free.
Storage Instructions
Homemade beef stew stores exceptionally well and often tastes even better after a day in the refrigerator.
Room Temperature
Do not leave the stew at room temperature for longer than 2 hours.
Refrigerator
Store in airtight containers for up to 4 days.
Allow the stew to cool before refrigerating.
Freezer
Freeze for up to 3 months in freezer-safe containers.
Leave a little space at the top of each container to allow for expansion.
Thaw overnight in the refrigerator before reheating.
Best Storage Container
Glass or BPA-free airtight containers help preserve flavor while preventing refrigerator odors from affecting the stew.
Food Quality Notes
The gravy naturally thickens during storage.
This is completely normal and often produces an even richer texture after reheating.
How to Reheat
Stovetop (Recommended)
Transfer the stew to a saucepan or Dutch oven.
Heat gently over medium-low heat, stirring occasionally until thoroughly warmed.
If needed, add a splash of beef broth to loosen the gravy.
This method preserves both the texture of the vegetables and the tenderness of the beef.
Microwave
Place individual portions in a microwave-safe bowl.
Cover loosely and heat in 1-minute intervals, stirring between each interval until hot.
Make-Ahead Instructions
This recipe is ideal for preparing in advance.
One Day Ahead
Cook the stew completely, cool it, and refrigerate overnight.
Reheat gently before serving.
Many people find the flavor even better the next day.
Meal Prep
Divide cooled stew into individual airtight containers.
Refrigerate for lunches or freeze for future meals.
Freezer Meal
Prepare the entire recipe, cool completely, freeze, then thaw overnight before reheating gently on the stovetop.
Serving Suggestions
A bowl of homemade beef stew is satisfying on its own, but the right side dishes can turn it into a memorable meal. Choose simple accompaniments that complement the rich gravy rather than compete with it.
Bread
Fresh bread is perfect for soaking up every last spoonful of the savory broth.
- Crusty artisan bread
- Homemade dinner rolls
- Buttermilk biscuits
- Cornbread
- Garlic bread
- Rustic sourdough
Vegetables
Balance the richness of the stew with simple vegetable sides.
- Roasted green beans
- Steamed broccoli
- Honey-glazed carrots
- Buttered peas
- Roasted Brussels sprouts
- Sautéed asparagus
Salads
A crisp salad adds freshness and contrast.
- Garden salad with vinaigrette
- Caesar salad
- Mixed greens with cucumbers and tomatoes
- Apple walnut salad
- Arugula salad with lemon dressing
Drinks
Pair with beverages that complement hearty comfort food.
Non-Alcoholic
- Sparkling water with lemon
- Unsweetened iced tea
- Fresh apple cider
- Hot black tea
Optional Alcohol Pairing
- Cabernet Sauvignon
- Merlot
- Malbec
Desserts
Finish the meal with a classic homemade dessert.
- Apple crisp
- Peach cobbler
- Bread pudding
- Chocolate brownies
- Vanilla ice cream
- Oatmeal cookies
Frequently Asked Questions
What is the best cut of beef for homemade beef stew?
Beef chuck roast is the best choice because it contains enough marbling and connective tissue to become fork-tender during a long, gentle simmer while creating a rich, flavorful gravy.
Why is my beef still tough?
The beef usually needs more time to cook. Chuck roast becomes tender only after its connective tissue has had enough time to break down during slow braising. Keep the stew at a gentle simmer instead of a rapid boil.
Can I freeze homemade beef stew?
Yes. Once cooled completely, store it in freezer-safe containers for up to 3 months. Thaw overnight in the refrigerator before reheating.
Can I make this recipe ahead of time?
Absolutely. Homemade beef stew is an excellent make-ahead meal because the flavors continue to develop overnight. Many people find it tastes even better the next day.
What potatoes work best?
Yukon Gold potatoes are an excellent choice because they become creamy while holding their shape. Red potatoes also work well.
How do I make the gravy thicker?
Mix cornstarch with cold water to create a smooth slurry, then stir it into the simmering stew near the end of cooking. Allow it to cook for a few minutes until the gravy reaches the desired consistency.
Can I use frozen vegetables?
Frozen peas work especially well because they cook quickly and retain their bright green color. Most other vegetables are best added fresh for the best texture.
Why do I brown the beef first?
Browning develops rich caramelized flavors that become part of the broth. Skipping this step results in a noticeably less flavorful stew.
Can I cook this in a slow cooker?
Yes. Brown the beef and cook the aromatics first, then transfer everything to a slow cooker and cook on Low for 7–8 hours or High for 4–5 hours, adding the vegetables according to their recommended cooking times.
Key Takeaways
- Use beef chuck roast and cook it low and slow for the most tender results.
- Brown the beef thoroughly to build deep, rich flavor.
- Add the vegetables in stages so each one cooks perfectly.
- Homemade beef stew stores and reheats exceptionally well, often tasting even better the next day.
- A gentle simmer—not a rapid boil—is the key to tender beef and a silky, flavorful gravy.
Quick Recipe Summary
This homemade beef stew combines beef chuck roast, potatoes, carrots, peas, onions, garlic, herbs, and a rich beef broth into a hearty one-pot meal that’s ideal for family dinners and meal prep. Browning the beef before simmering creates deep flavor, while adding the vegetables in stages ensures each ingredient reaches the perfect texture. A simple cornstarch slurry gives the broth a glossy, velvety consistency without becoming overly thick. The stew keeps well in the refrigerator for several days, freezes beautifully, and often develops even more flavor after resting overnight, making it a dependable comfort food recipe for busy home cooks.
More REcipes: